


Resetting the Ethernet adapter usually involves disabling and re-enabling it. Disabling the adapter unloads the device driver and sets the interface state as Disconnected. It also leads to other device-specific procedures like clearing the ARP table entries.
This is why a basic adapter reset fixes so many networking errors in Windows. If simply restarting the adapter doesn’t help, you can also try a complete reset by resetting and reinstalling the networking components.
Performing a basic reset on your Ethernet adapter will solve various errors (e.g., network protocols missing). Let’s look at some other cases though.
Instead of resetting the Ethernet adapter, disabling the wireless adapter helps with the Err_Network_Change problem. Disabling the Virtual WiFi Miniport Adapter can fix DNS errors. Disabling all adapters except the Ethernet adapter can solve the Unidentified Network error.
The point here is that resetting the Ethernet adapter will fix some problems, but resetting or disabling the rest will be more effective for others. Please keep this in mind when troubleshooting your current problem.
Restart Ethernet Adapter
Do note that your account must be a member of the Network Configuration Operators or Administrators group to reset the Ethernet adapter.
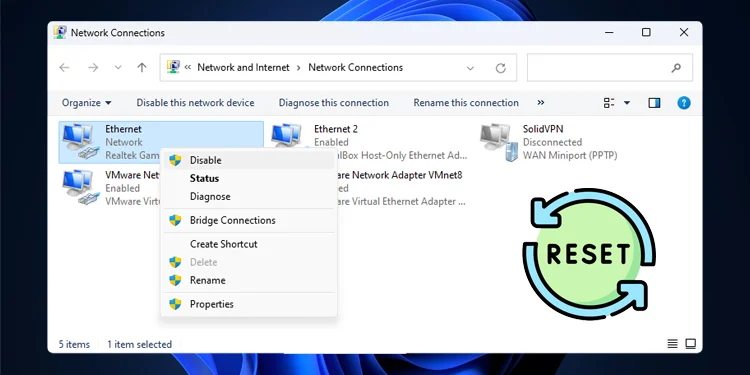
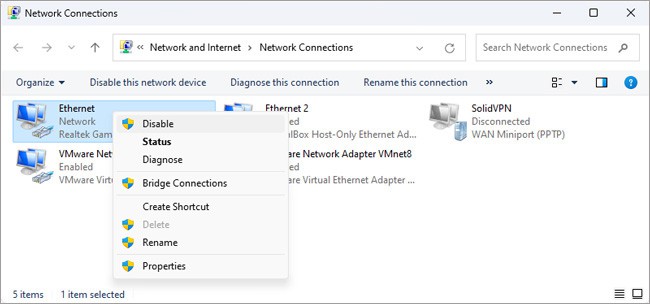
Network Connections Applet
- Press Win + R, type
ncpa.cpl, and press Enter. - Right-click your Ethernet adapter and select Disable.
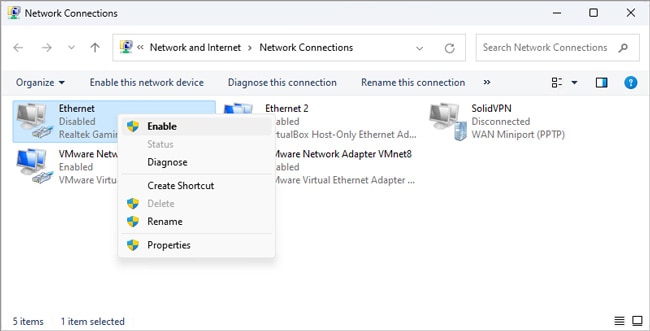
- Then, right-click it and select Enable.


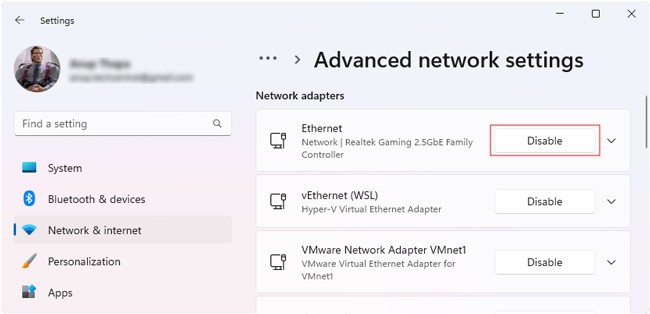
Windows Settings
- Press Win + I and select Network & internet > Advanced network settings.
- Disable the Ethernet adapter here, then re-enable it.

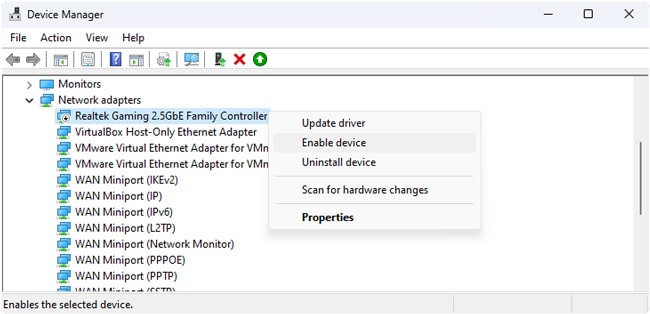
Device Manager
- Press Win + R, type
devmgmt.msc, and press Enter. - Expand the Network adapters section.
- Right-click your network adapter and select Disable device.

- Press Yes to accept the confirmation prompt.
- Then, right-click it and select Enable device.
Command Prompt
- Press Win + R, type
cmd, and press Ctrl + Shift + Enter. - Enter
netsh interface show interfaceand note the interface name of the Ethernet adapter. - Enter
netsh interface set interface <interfacename> disable. If the interface name contains spaces, use double quotes as shown in the picture.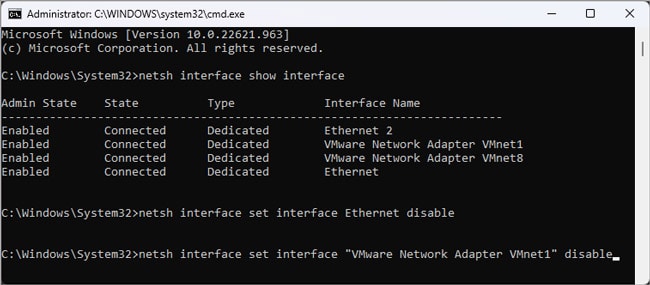
- Re-enable the adapter with
netsh interface set interface <interfacename> enable.

PowerShell
- Press Win + R, type
powershell, and press Ctrl + Shift + Enter. - Enter
Get-NetAdapterand note the interface’s Name. - Enter
Disable-NetAdapter -Name <interfacename>. If the interface name has spaces, use double quotes.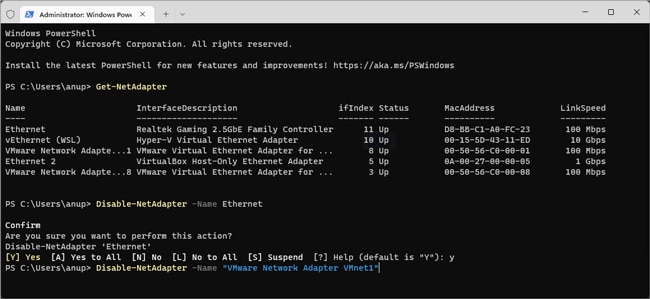
- Enter Y to confirm the action.
- Execute the
Enable-NetAdapter -Name <interfacename>command to re-enable the adapter.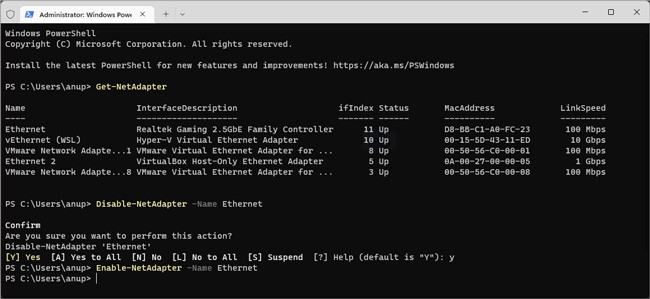

Reset/Reinstall Networking Components
When a basic reset isn’t enough, you’ll need to resort to a thorough reset to fix any problems with your Ethernet adapter.
Step 1: Reset Network Components
To start, we’ll reset the Winsock catalog to a clean state. Then, we’ll reset the TCP/IP parameters, which does the same thing as removing and reinstalling TCP/IP would.
- Press Win + R, type
cmd, and press Ctrl + Shift + Enter. - Execute the following commands:
Netsh winsock resetNetsh int ip reset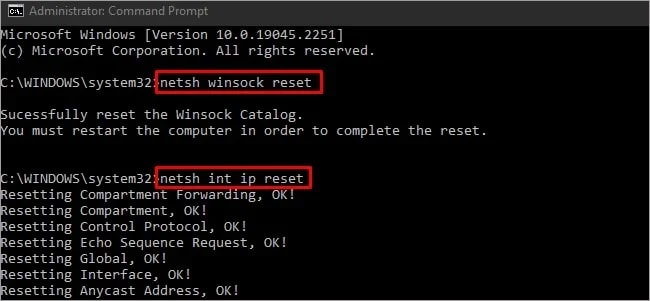
- Restart your PC and check if your problem is resolved. If not, check the next step.

Step 2: Fix Ethernet Driver
A corrupted Ethernet driver falls among the most common reasons for networking problems. Sometimes, simply updating to the latest driver will fix the problem. In other cases, the latest driver might be the problem and you’ll need to revert to an older stable version.
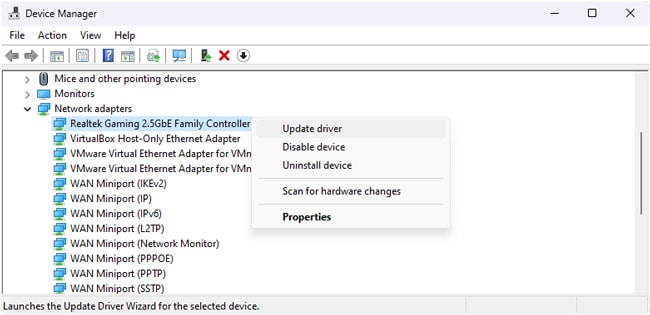
- Press Win + X and select Device Manager.
- Expand the Network Adapters section.
- Right-click your Ethernet adapter and select Update Driver.
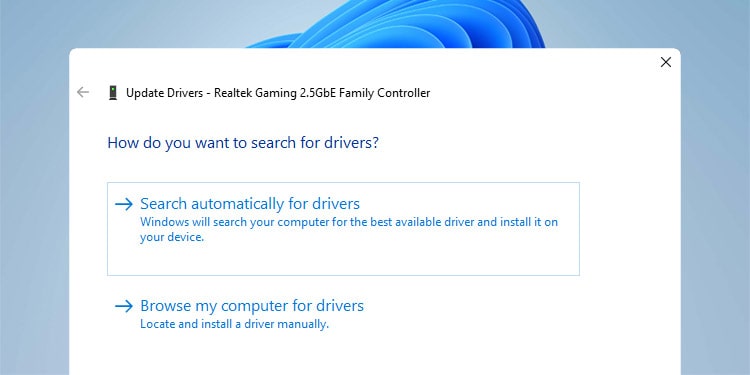
- Select Search automatically for drivers and follow the on-screen instructions.
- If auto-update doesn’t help, download the driver from your device manufacturer’s site.
- If they provide a driver installer, use that. But if they provide
.inffiles, open Device Manager again. - Follow Steps 2-3 and select Browse my computer for drivers.
- Select Browse and locate the folder containing the driver files.
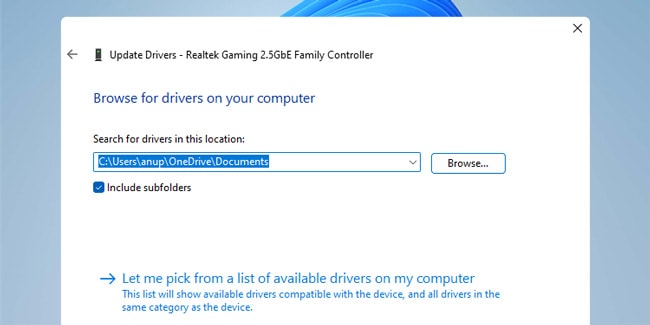
- Press Next > Ok and follow the on-screen instructions to update the network driver.


As stated, updating to the latest driver will generally fix networking problems. But sometimes, you may need to try out different driver versions until you find a compatible one.
What If Resetting Doesn’t Work?
In rare cases, the adapter keeps getting disabled automatically, or users are unable to turn it back on. If this is happening to you, here’s what we recommend:
Press Win + X and select Device Manager.
In the Network Adapters section, right-click your Ethernet adapter and select Properties.
ethernet-controller-properties
In the Power Management tab, ensure the Allow the computer to turn off the device to save power option is not enabled.
ethernet-controller-power-management-properties
If you made the change just now, press Ok to apply it.
Aside from this, we’ve mostly seen this problem occur after updating or upgrading Windows. As such, updating to a newer patched version, or reverting to an older stable one is the best course of action here. Installing a compatible driver directly from your device manufacturer, as detailed in the previous section, can also help.