


USB flash drives are a great storage option when it comes to transferring and backing up your files.
The plug-and-play standards along with a portable form factor make USB flash drives a more convenient option than traditional storage media.
This storage device has made leaps and bounds with each generation, improving its transfer speed and efficiency. In this article, we will discuss the basics of USB drives and how you can use them to their full potential.
How to Use a USB Flash Drive?
Here’s the step-by-step breakdown on using the USB flash drive.
Step 1: Locate the USB Port
Usually, the USB ports are rectangular-shaped slots located on the front or the back of the CPU case. The I/O panel on the back of most computers includes plenty of USB ports. While on Laptops, these ports are found on the side of the device.
In general usage, the USB ports in the back are mostly used for connecting the peripherals like the Keyboard and mouse. Similarly, USB ports on the front are ideal for connecting the USB flash drives and other USB-based devices that you plug in and out very often.
The computers available nowadays include a variety of USB ports that offer different data transfer speeds. You can determine the standard and specs of the USB ports or connectors through their color coding. The identification of the port standard is important if you want to get the best transfer speeds that your USB flash drive and the port can offer.
Here’s a list of the color coding that is found on most PCs and laptops along with the version it indicates and its specifications.
There are other USB ports found on some computers with Yellow and orange color codes. These ports support high data transfer speeds and also come with sleep or stand-by charging capabilities.
Some laptop manufacturers even come up with different colors for the USB ports irrespective of the port version to match the design aspect. Therefore, follow the user manual to get the actual details of your device’s USB port.
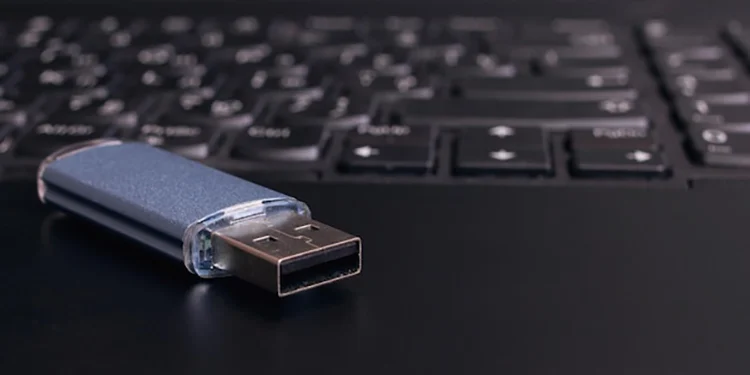
Step 2: Connect the USB Flash Drive
The next thing you have to do is connect the USB flash drive to the respective port. Although you can connect the USB to any existing ports, to make full use of the transfer speeds offered by your USB flash drive, connect it to the one that matches the connector’s generation. For instance, if you have a USB 3.0-based flash drive connect it to the USB 3.0 port of your PC or laptop.
Note: While connecting the USB drive, do not try to forcibly insert it into the port. If you aren’t able to get it plugged in, turn the USB drive upside down and then try connecting.
- Gently insert the flash drive into the port. Once the drive is properly connected, Windows will automatically detect it and install the related drivers.
- If the USB drive isn’t connected correctly, or Windows fails to recognize it, you will receive an error prompt saying “USB Device Not Recognized.” In case Windows isn’t able to install the drivers, you will get a message “Device driver software was not successfully installed.”
To help you through such a situation, you can check our detailed guide on USB device not recognized.
Step 3: Access the USB Flash Drive
Once your computer has recognized the USB flash drive, you will then be able to access the USB drive from File explorer.
To send the files on your computer to the flash drive, copy the preferred file and paste it inside the USB volume from File Explorer. You can transfer the contents in the USB drive to your computer in the same way.
After you have finished using the USB drive, go to the system tray, click on the USB icon and click on eject. This is to ensure that no loss in the data that are written from the USB controller to the flash drive before it is disconnected.
Step 4: Using the USB Flash Drive
Other than data portability and backup, flash drives can be used for other tasks like creating a Live USB, carrying portable apps, running system diagnostics, and much more.
Storing Portable Apps on USB
USB flash drives can be used for carrying portable software. The benefit of having portable applications on a USB is that you can use them over different computers without having to install them on each system.
Some popular applications like VLC media player, Google Chrome, and Libre office can be carried on a USB drive and used on different computers without installing them. You just need to download a portable version of the software (if available) and transfer them to your USB flash drive. Next time you need to run this software, just plug in the flash drive and open the executable file.
For instance, To create a USB flash drive with a portable VLC media player.
- Download the portable version of the VLC media player.
- Connect the USB flash drive to your computer.
- Copy the portable VLC media player file that you downloaded earlier into the flash drive.
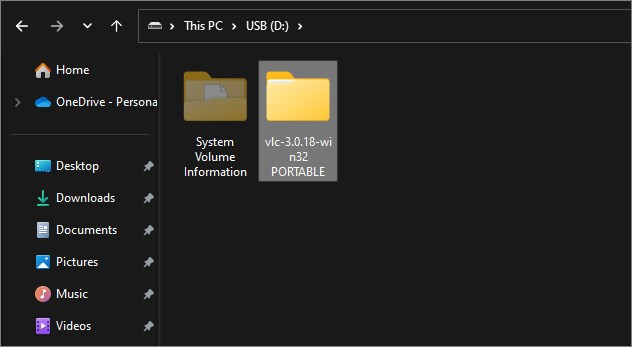
- Finally, you will be able to run the media player on any computer using the flash drive without installing it.

Creating a Live or Bootable USB
A Live USB carries a portable and full-sized operating system that users can boot from a flash drive. Such live USBs can be used for testing, installing, or upgrading an operating system or even fixing issues with it. The live USB allows the users to work with Linux on Windows-based computers.
On Windows, you can efficiently create a Live USB using Rufus. It is recommended that you use a USB flash drive with a minimum of 32 GB storage for Windows Live. Although, some of the Linux distros require a lot lesser storage on the flash drive. Also, ensure that you have an ISO of the preferred Operating system already downloaded over your computer.
Here’s how you can create a Windows Live USB using Rufus. You can follow similar steps in order to create a Linux bootable USB.
- Insert the USB drive into your PC and launch Rufus.
- Select the USB drive from the drop-down menu on Device.
- On Boot selection, choose Disk or ISO image and then click on Select.
- Select the ISO from the downloaded directory.
- Now, click Windows To Go from the Image option.
- Click on Start to proceed and select the version of Windows from the pop-up menu.
- Next, on Windows User Experience, check mark the “Set a local account using the same name as this user’s” and click on OK.
Formatting the USB Drive
If you want to clear out all the files on the USB drive, formatting can be a convenient option. It is also helpful if you are facing issues on the USB such as slower speeds, or file system errors. While formatting, you can even change the file system for the USB drive.
- Connect the USB drive to your computer.
- Open the File explorer.
- Right-click on the USB volume and select Format.
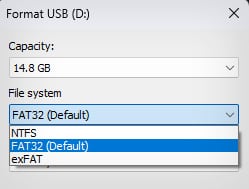
- Select the desired file system. You have three file systems to choose from.
- FAT32: The FAT 32 system only can have individual files of size lower than 4GB and also has some limitations on the partition size.
- NTFS: This file system is compatible with other operating systems such as Linux. It also offers better disk utilization and individual compression of the files. The NTFS file system’s read-write speeds are faster as well.
- exFAT: The exFAT has no limits set to the sizes of partitions you can create. This file system is also more compatible than NTFS.
- Check on the Quick format if you want the format process to complete faster by skipping the bad sectors scans.
- Click on the Start button.


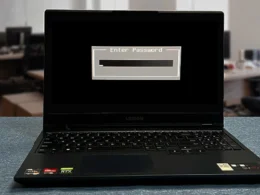
Encrypting the USB Flash Drive
USB drives can have a lot of sensitive data that can be easily accessed by anyone if it is not encrypted. An encrypted USB flash drive will require an authentication password or decryption key in order to access the data inside it. This acts as an added layer of security to protect the data.
Windows has an inbuilt encryption utility known as BitLocker that uses Advanced Encryption Standard (AES) of 128 or 256-bit keys. However, this utility is not available to Windows home users.
To encrypt the USB Flash drive using the Bitlocker,
- Connect your USB flash drive to the computer.
- Go to the file explorer, locate the USB volume, and right-click on it.
- Select Turn-on BitLocker. The BitLocker Encryption window will open up.
- Check the Use a password to unlock the drive option and set the preferred encryption password as per the given standards.
- Click on Next.
- Now, choose the option to how you would like to back up the recovery key.
- Follow the on-screen prompts and the encryption process will be completed.
- Eject the USB flash drive and reconnect it to your computer. The system will now ask you for the decryption password in order to access the flash drive.
Protecting the USB Flash Drives from Viruses
Since USB storage devices can get connected to multiple computers, they get exposed to viruses and malware quite often. This can lead to unwanted file deletion, modification, or even cause the USB flash drive to malfunction. Using such USB drives can also infect your computer and compromise the security of the system and data.
Here are some of the preventive measures you can adopt to get away with virus and malware infections on your USB device.
- Avoid using USB devices with sensitive files on computers of which you have no idea.
- Install good Antivirus software and keep it updated. Also, ensure that the Real-time protection in the Windows security app is enabled.
- If possible, write-protect the USB flash drives. It restricts malware and virus to be infect the device and also prevents any sort of alteration of the files.
Here is how you can change the attributes to read-only of a USB flash drive using command lines.
- Connect the USB flash drive to the computer.
- Press Windows Key + X and open Terminal (Admin).
- Enter these commands one after another and press enter.
DiskpartList disk - Note down the Disk ID of the USB flash drive you want to write protect and then enter this command
Select disk 1 - The disk id, in this case, is disk 1. Replace it with the one you noted earlier.
- Now execute these commands one by one.
Attributes diskAttributes disk set readonly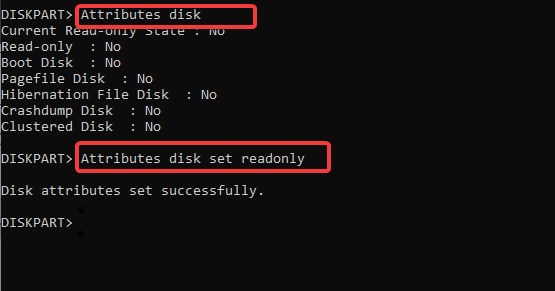
- Now, it won’t be possible to write anything into the flash drive. If you need to clear the attribute and allow writing into the drive follow the above steps from 1 to 4 and then execute this command line.
Attributes disk clear readonly

Tips to Extend Life of USB Flash Drive
- Disconnect the USB drive after you have finished using it. Keeping it connected for an extended period even when it is not being used will diminish its life. Before you disconnect the flash drive, always eject it from the system tray.
- As USB storage devices have limited write cycles, avoid editing the files inside them directly. For instance, if you have a document file(.docx) inside the drive, do not edit it directly from the drive.
- Do not defrag your USB flash drive. The limited write cycles will get affected diminishing the longevity of the drive. Defragging a flash drive also has no significant effect on its performance.
- Protect the USB drive from exposure to high temperatures and water. Carry the flash drive in a bag or a pouch to prevent any physical damage.