


One must-have feature on any laptop is its ability to illuminate the keyboard. Enabling the backlight not only allows users to see individual keys in low-light conditions but also makes your keyboard look a lot more attractive.
Your keyboard will have a dedicated key that enables and disables its backlight. For Dell laptops, this key is usually the F6, F10, or one of the arrow keys. So, pressing the Fn + F6/F10/arrow keys simultaneously should enable keyboard lights on Dell laptops. If it does not work, you need to find the backlit key for your keyboard to control the keyboard lights.
Depending on your Dell laptop, it may even have a dedicated application that controls keyboard lighting.
Does My Laptop Have a Backlit Keyboard?

Before we jump into the how-to part of the question, you need to know whether your laptop’s keyboard has a backlight.
Not all Dell laptops have a backlit keyboard. To check whether your keyboard has backlights, search the function keys for the backlit key. Usually, a key with a backlit icon, shown in the image, is the key that controls the keyboard backlight.
Some Dell laptops have the backlit icon on one of the arrow keys. If you cannot find the backlit key, check the arrow keys.
There is a high chance that your Dell laptop does not have a backlit keyboard if your keyboard does not have a dedicated backlit key.
In case your laptop’s keyboard does not illuminate even when it has a dedicated keyboard backlit key, it could be that the keyboard illumination settings are disabled from the BIOS itself.
How to Turn on Keyboard Light on Dell?
For any laptop, the easiest way to enable the keyboard light is through the backlit key. As for Dell laptops, you can adjust the keyboard light in a few different ways. Let us first start with the easiest of them all.
Using the Backlight Key
The first and simplest way to enable the backlight on any laptop keyboard is by using the backlight key. If your laptop keyboard supports the backlight, you will have a dedicated keyboard button to control the keyboard lighting.
- Search the keyboard for a key with a backlit icon.
- Press this key once to enable the backlight.

- Keep pressing the backlight key to scroll through the keyboard’s backlight brightness.
Using Alienware Command Center
Besides the backlit key, some Dell laptops support the Alienware Command Center that allows the user to access and control several system configurations, such as CPU/GPU temperature, voltage, and usage, memory speed.
Besides this, you can also control your keyboard backlights using the Command Center. Command centers usually come pre-installed on Dell gaming laptops.
However, not all Dell laptops support the Alienware command center. If you are using an Alienware or G-Series laptop, you can adjust the keyboard light using the Alienware Command Center.
- Press the Windows key and select All apps.
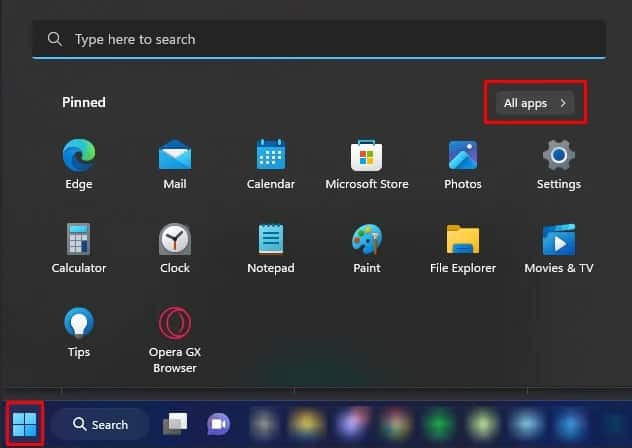
- Search Alienware Command Center and open the application.
- Click on AlienFX. Here, you will see your keyboard layout.
- Select the area of the keyboard.
- On the left panel, select any color for your keyboard. You can also set up a custom theme that suits your laptop.
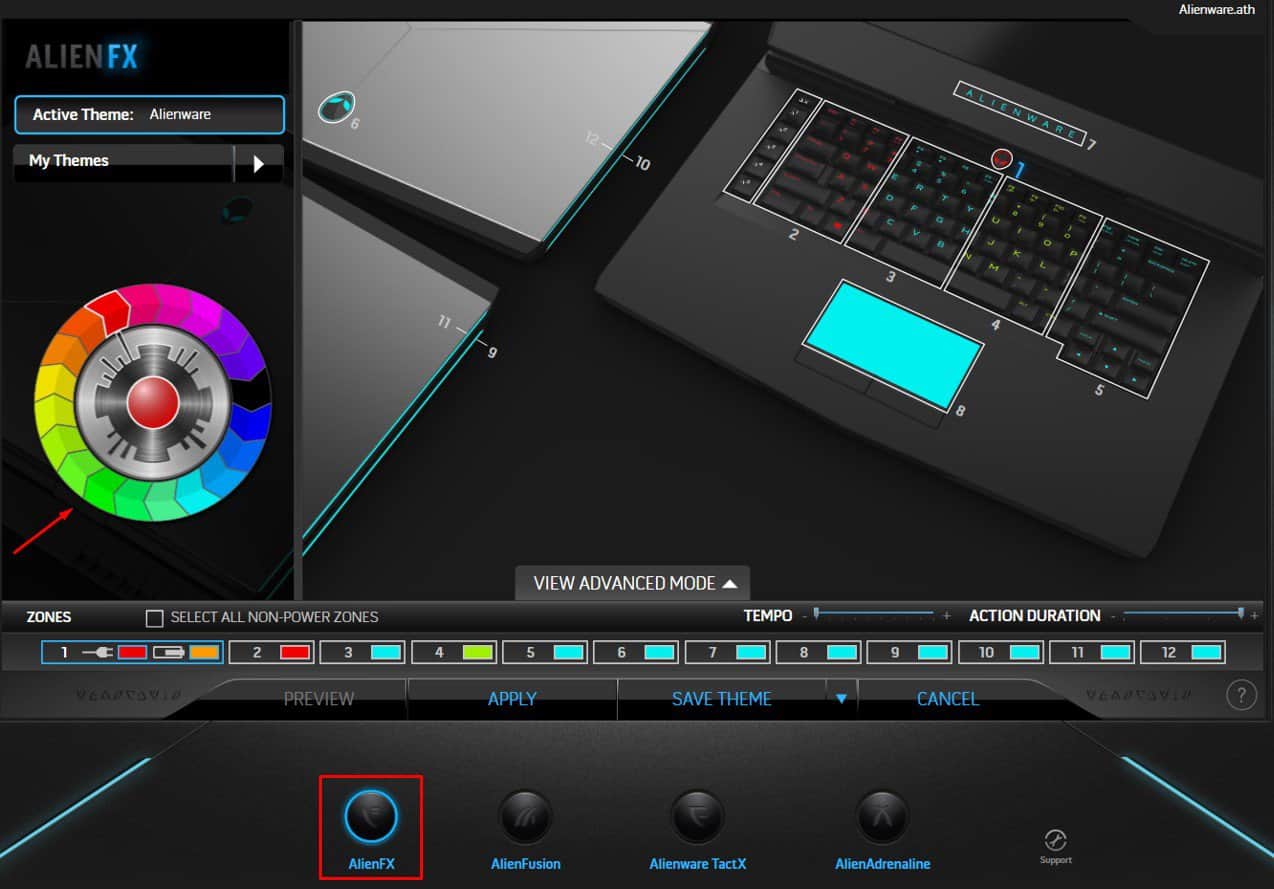
- If you want to turn off the keyboard backlight, you need to select the color black.


Some Dell laptops do not have a pre-installed Alienware Command Center. In that case, you need to download and install the command center for your Dell laptop.
- Go to the Official Dell Support Page.
- Under Search Support, enter your laptop model and click on Search.

- Go to the Drivers & Downloads page.
- Under the keyboard, type
Alienware Command Centerand press Enter.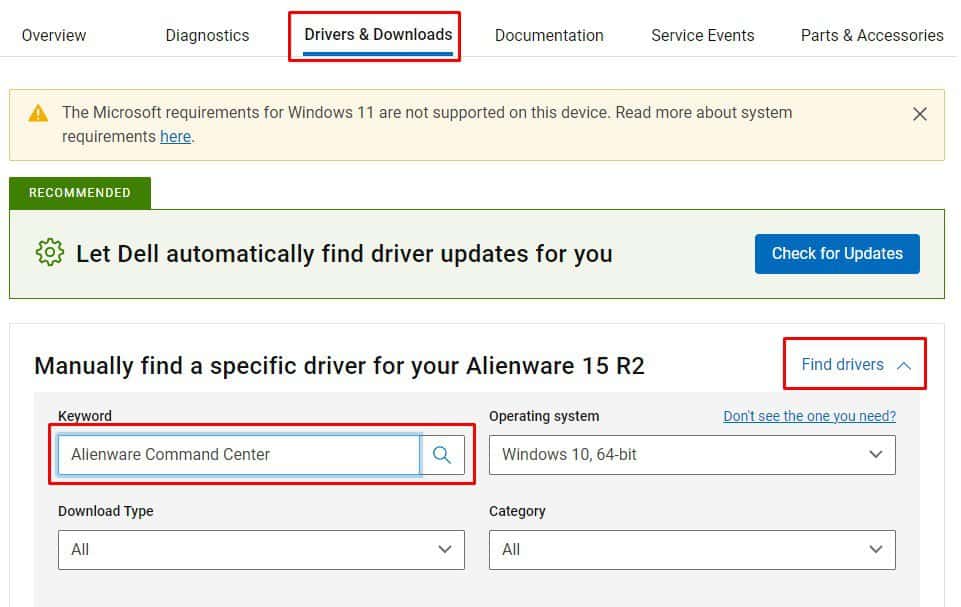
- The website should give you a download link to download Alienware Command Center for your Dell laptop. Click on Download.


If Dell’s support page does not display Alienware Command Center, it could be that the laptop is incompatible with Alienware Command Center.
Enable the Keyboard Lights from BIOS
Dell laptops also have a dedicated setting in BIOS which allows users to control keyboard backlight illumination. Besides this, the BIOS also allows the user to set the keyboard backlight timeout period.
Some settings in the BIOS may not be visible if you do not have an up-to-date BIOS. If you cannot find the keyboard illumination settings in the BIOS, we recommend that you update the BIOS first.
Note: All the settings mentioned below apply to Dell Latitude, Dell Precision, Dell Vostro, Dell XPS, Dell Inspiron, and Dell G Series laptops.
- Turn on your laptop and repeatedly press the BIOS key to enter the BIOS. On most Dell computers, the BIOS key is the F2 key. If the F2 key does not take you to the BIOS settings, you can also refer to your laptop’s user manual for the BIOS key .
- On the left panel, expand System configuration and search for a heading named Keyboard Illumination.
- Disabled means the keyboard backlight will turn off, Dim sets keyboard illumination to 50% brightness, and finally Bright sets keyboard brightness to 100%.
- Click on Apply changes and select OK if the BIOS asks for confirmation.
- Exit the BIOS.
If you are using an older version of BIOS, the configuration in Keyboard Illumination may be different. Here, Disabled or Off means keyboard illumination off, Auto ALS and input allow automatic keyboard illumination depending on lighting conditions.
To use Auto ALS and input, you first need to enable Ambient Light Sensor.
- In BIOS, check the left panel and expand Video.
- Click on Ambient Light Sensor.
- Set it to Enable.
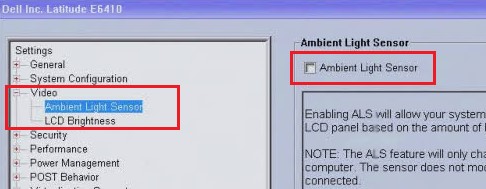
- Save and Exit the BIOS.

How to Keep Keyboard Lights Permanently On?
By default, the backlit keys on your Dell keyboard will turn off after being inactive for a certain time. Tweaking the right BIOS setting, you can set the timeout period for your backlit keyboard. Not only this, but you can also set the timeout period to never so that the keyboard lights stay on permanently.
- Repeatedly press the BIOS key during startup to enter BIOS. If you enter the Operating system, restart your system and repeat this step.
- On the left panel, click on System Configuration and select Keyboard Backlight with AC.
- Now on the right panel, enable Keyboard Backlight with AC.
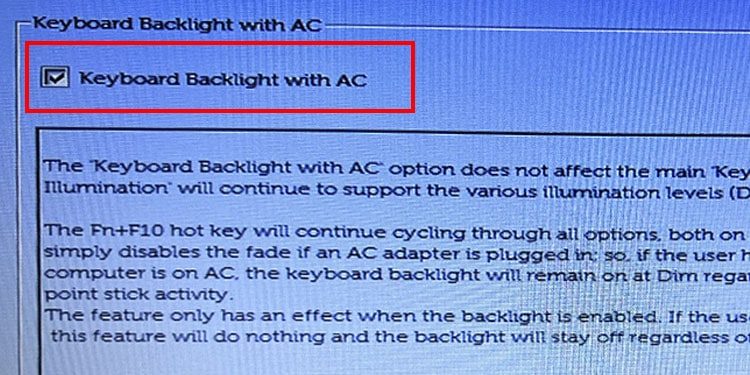
- Some Dell Laptops also allows you to set backlight timeout on battery. Check Keyboard Backlight Timeout on Battery. This allows you to set the timeout period for your keyboard when on the battery.
- Click on Apply Changes.
- Click on OK if the BIOS asks for any confirmation.
- Exit the BIOS and see if the keyboard backlight turns on permanently.