


Dell’s XPS line consists of high-end desktops and laptops. The desktops live up to their reputation and are pretty reliable. The laptops aren’t bad either, but one recurring issue I’ve seen with XPS laptops is that they don’t turn on.
Troubleshooting a Dell XPS laptop that doesn’t turn on is usually pretty easy though, thanks to the diagnostic indicators. The pattern of the LEDs and beeps will point you to the exact component that has failed.
Note: We have other dedicated articles for fixing boot errors like No Bootable Device, or if your laptop is stuck on the Dell loading screen. This article will specifically focus on power and POST-related issues.
I’ll first cover cases where the laptop doesn’t show any signs of power at all. If the laptop at least powers on, you can skip ahead to the Diagnostic Indicators section.
Drain Residual Charge
When you press the power button, the PSU sends a PWR_OK signal to the motherboard to indicate that it’s safe to boot. Sometimes, the capacitors in the components store static charge which blocks this signal and prevents your system from booting.
Draining this residual flea power, as Dell calls it, gets the laptop working again in most cases. There are a couple of ways to do this. On laptops with removable batteries, you can perform a hard reset with the following steps:
- Disconnect the AC adapter and remove the battery.
- Remove any external devices like USB drives.
- Hold the power button for around 20 seconds.

- Reconnect the AC adapter and battery and check if the laptop turns on.

On laptops that have a non-removable battery, you can perform a Real-Time Clock (RTC) reset instead:
- Connect the AC adapter to the laptop.
- Hold the power button for around 35 seconds.
- After the power LED blinks three times, release the power button.
- Check if the laptop turns on.
Check Power Components
If the device shows no signs of power at all (no fans, beeps, LEDs, etc.), one of the components is likely dead.
- Start by checking the LED indicator on the AC adapter.
- If it’s not lit, check the charger connector, cable, and laptop’s charging port for any signs of visible damage (bent pins, torn cables, excessive dirt, etc.).
- You can also try a different wall outlet and charger to ensure they’re not the issue.
- Additionally, if you’re using a docking station or surge protector, skip them and plug the laptop directly into an outlet.
- If none of these helped, either your charging port or motherboard is dead. You’ll most likely have to replace the faulty component.
Check Diagnostic Indicators
If the laptop at least powers on and tries to POST, there should be some indication as to what the issue is (LEDs, beeps, etc.). I recommend checking the blinking pattern of the LEDs first.

Let’s say the LED blinks Amber two times, pauses for 1.5 seconds, then blinks white three times. The LED code here is 2,3 (Amber – 2, White – 3). This pattern will keep repeating every three seconds.
You can check this reference guide from Dell or your device manual to understand what the code is indicating and what you can do to fix it. The same applies if your device is producing audible beeps. Simply note the number of beeps and check the Beeps section in the linked guide.
After referencing the guide, you’ll need to take appropriate steps to fix the root problem. This can range from BIOS reset or recovery to reseating or replacing certain components. We have a detailed article covering such fixes with step-by-step instructions that you may find helpful going forward.
Troubleshoot Faulty Components
You should know what the exact issue is thanks to the diagnostic indicators. For instance, the 2,3 LED code from earlier indicates that no memory was detected. You can usually fix this by reseating the RAM.
But there will be other cases where you need to replace faulty components with new ones. I’ll cover how you can replace the CMOS battery as an example here as I’ve found CMOS battery failure to be one of the most common reasons for this issue.
- Disconnect the AC Adapter and remove the battery.
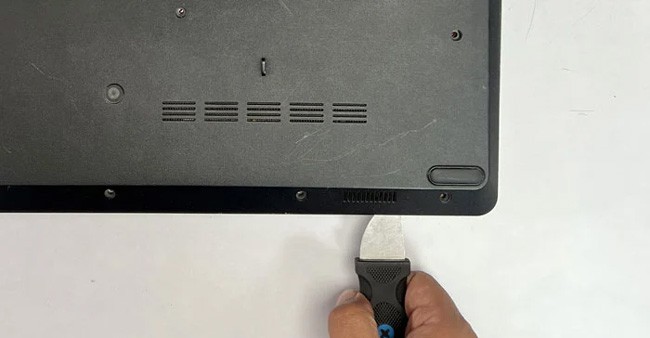
- Remove the screws and pry out the base cover.
- Use a plastic scribe tool and gently lift up the CMOS battery. It should pop right out without much effort.
- Grab the new battery and place it in the slot.

You can replace other components in a similar manner as required. I recommend referring to your device’s service manual/owner’s manual for this, as you’ll find step-by-step instructions with pictures of your exact device model and components. You can always take the device to the service center too if you’re worried that you’ll damage the hardware.