


It’s annoying when your computer lags so much that you can’t even perform simple operations. So, if you’re noticing input lags, slow startup, or even overheating issues, you’re at the right place!
Well, your PC might start lagging due to a corrupted operating system, viruses, or hardware faults. Moreover, you can even face this issue due to excessive use of browser tabs, unwanted background processes, and outdated device drivers.
No matter the cause, this article deals with all the necessary fixes you can apply to speed up your PC. So, without further delay, let’s jump right into why your computer is lagging and its possible solutions.
Why is My Computer Lagging So Much?
If your computer suddenly lags when playing games or videos, it’s crucial that you identify what’s causing this problem. Well, this could be due to several programs running concurrently or some serious issue within the storage devices.
Apart from that, here are some of the other reasons why your PC is lagging so much:
- Junk files have piled up on your HDD or SDD
- Your OS is corrupted with viruses
- Too many open tabs on your web browser
- Background programs are taking up memory
- Low disk space
- Outdated OS or drivers
- Problems within graphics card, RAM, HDD, or SDD
How to Fix Computer Lagging
Indeed, it’s pretty tricky to determine what’s causing your computer to lag so much. If you’re experiencing this problem for the first time, you can try restarting your PC. Basically, rebooting will remove the unnecessary files that are tampering with your physical memory and can speed up the processes.
However, if your computer lags randomly at startup, in between games, surfing the web, or even while performing simple operations, you can opt for the below-mentioned fixes.
Remove Unwanted and Unused Files and Programs
Undoubtedly, computer storage is the prime reason why your computer is often lagging. This is because if you do not delete old files and programs, the lack of storage space will slow down your OS.
Moreover, if your system is running a heavy application, you will likely experience a PC bottleneck. Indeed, this will significantly slow down your computer, and there’s a high chance it may affect its overall performance in the long run.
Thus, the first thing we recommend is removing all the temporary files that are taking up your memory:
- Press Windows + R and run
%temp%.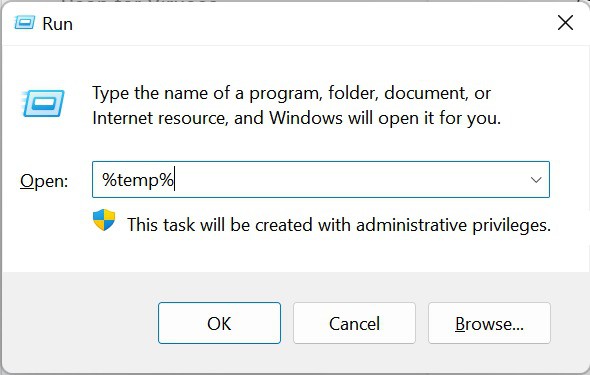
- Once you are directed to the file explorer containing temporary files, you can select them all.
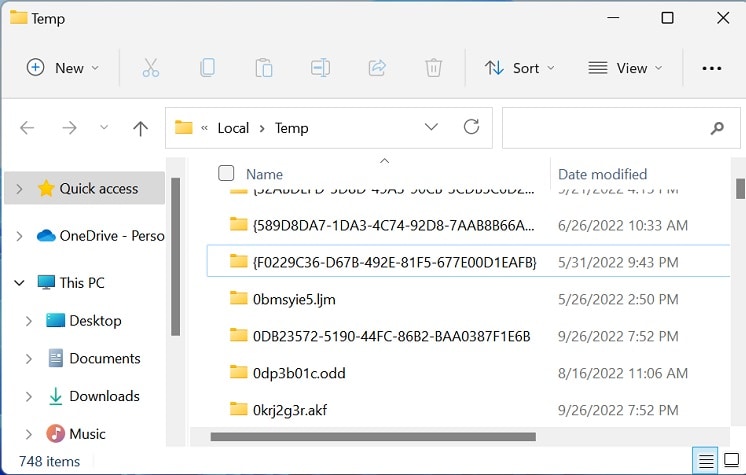
- Now, use the Shift + Delete keys to delete them permanently from your computer.


Moreover, we also suggest uninstalling all those applications or programs that you do not use anymore:
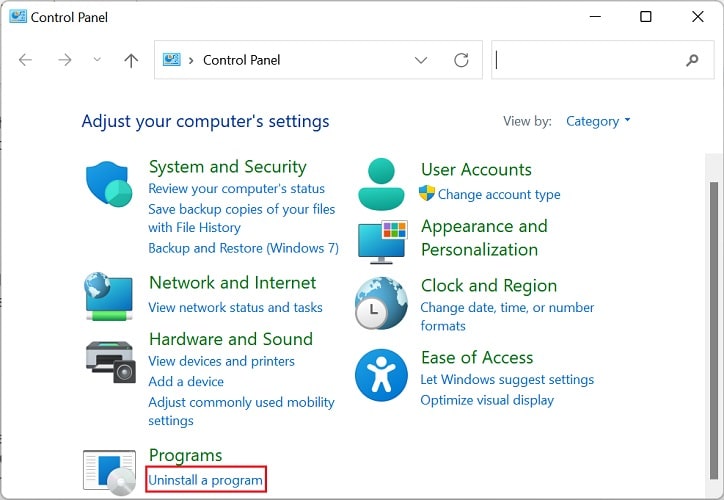
- Launch Control Panel from the start menu.
- Next, select Uninstall a program under Programs.
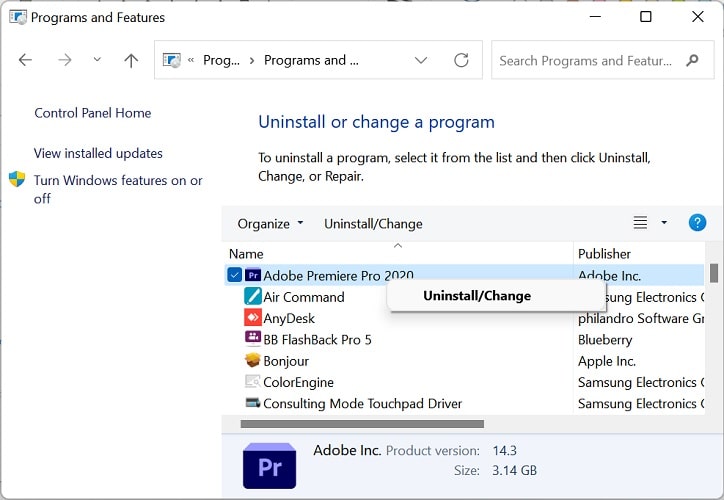
- Now, identify the apps that you do not require. Right-click on each of them and select Uninstall.

Lastly, removing photos and videos from your PC is the best way to save storage and boost PC performance. Well, you can either delete them permanently or keep a backup on USB drives or online file storage programs.
Scan for Viruses
Viruses can corrupt your data, programs, or even the operating system. Basically, it can cause interference with the normal functioning of your computer, and this is probably why you’re lagging so much.
Moreover, most viruses continuously run in the background and hogging up memory and CPU usage, which is also the major reason behind lags. Thus, it’s essential that you eradicate such harmful programs.
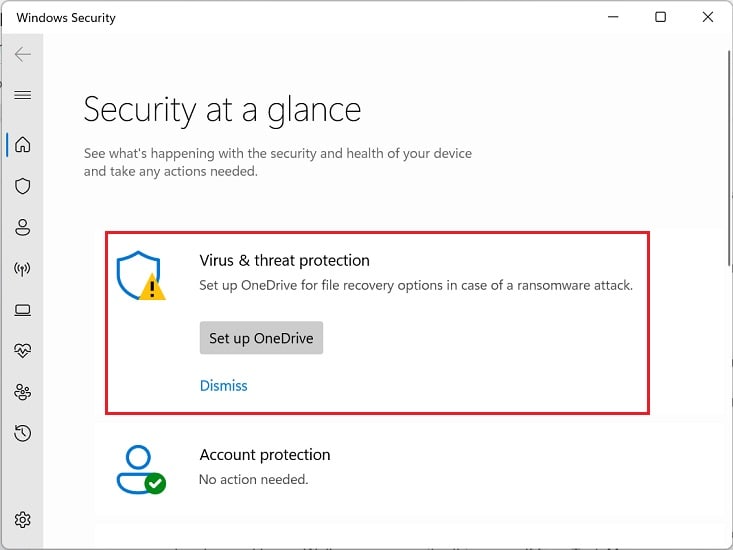
Although you can use multiple antivirus programs available online for free, we suggest using the built-in Virus & Threat Protection service to detect and remove threats:
- In the Instant Search, search and launch Windows Security.
- Now, go to Virus & Threat Protection.
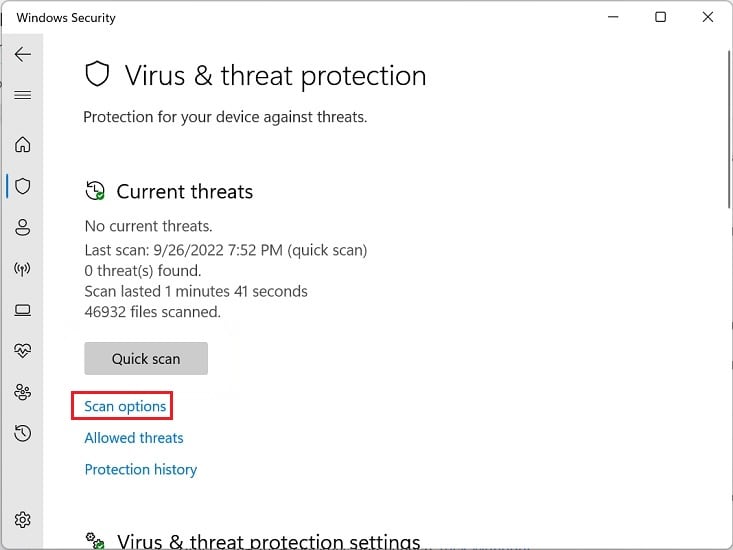
- Next, you can directly click on the Quick scan to check for system folders that are often stacked with threats.
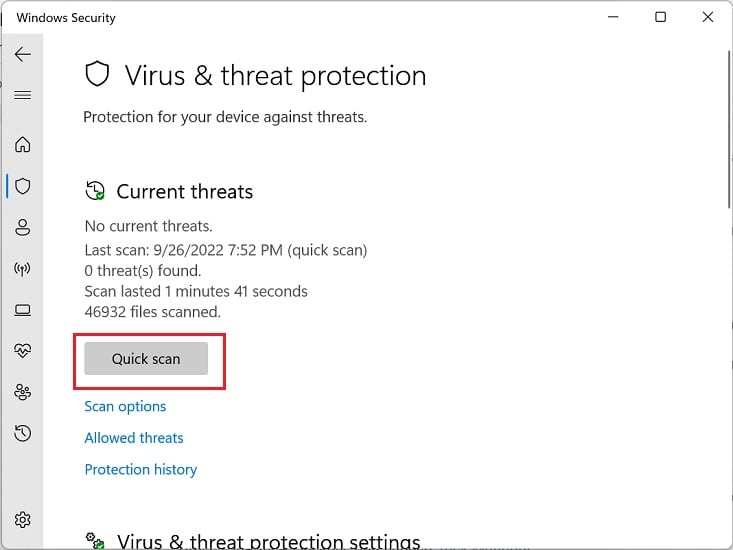
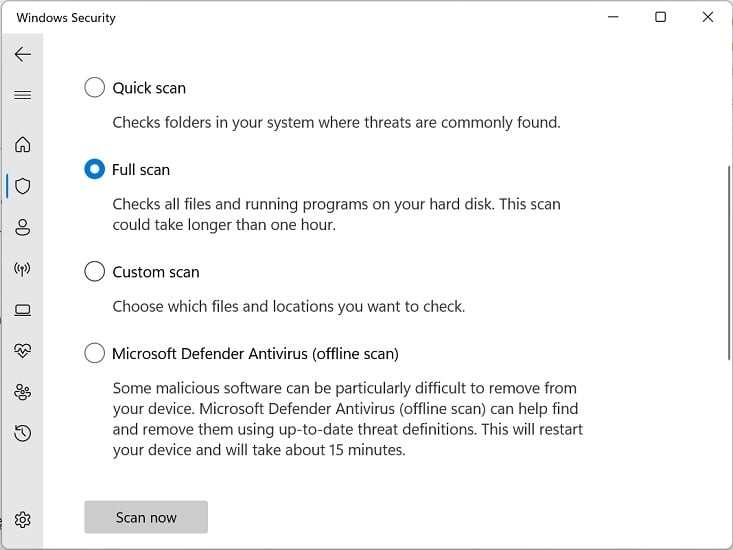
- Otherwise, you can select Scan options and any other scan method – Full, Custom, or offline.
- Finally, click the Scan Now button and wait until your files are scanned thoroughly.


Limit the Number of Tabs on Web Browsers
Interestingly, web browsers take up significant memory. Hence, it’s pretty sure that every tab you open will consume some extra amount of RAM, making your computer slow and laggy. Well, you can monitor this yourself from Task Manager:
- Press Ctrl + Alt + Del keys and choose Task Manager.
- In the Processes tab, check for your browser under Apps. You’ll likely witness the web browser taking up the most CPU and memory usage.
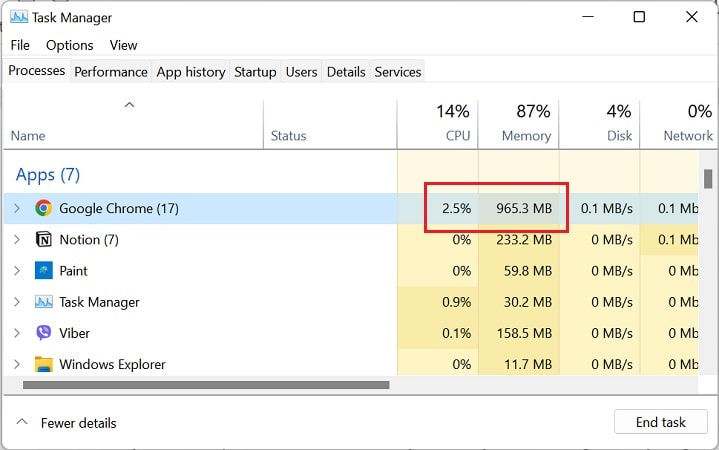
- Next, you can expand the browser, and you’ll likely notice a significantly large number of tasks.
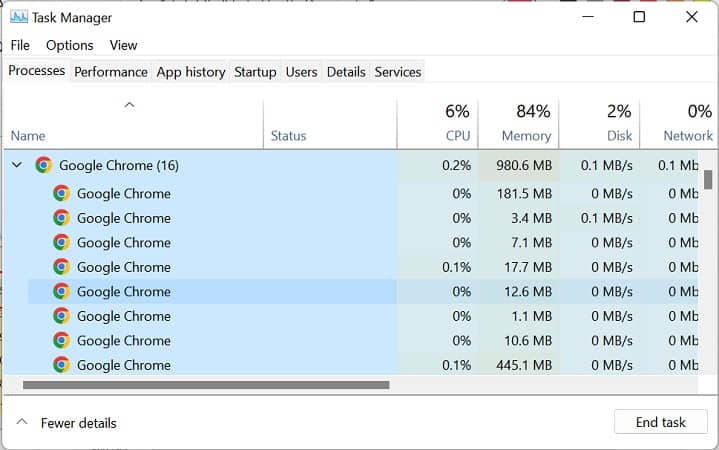

Although most web browsers come with a tab sleeping feature, the best solution to reduce this problem is to limit the number of tabs.
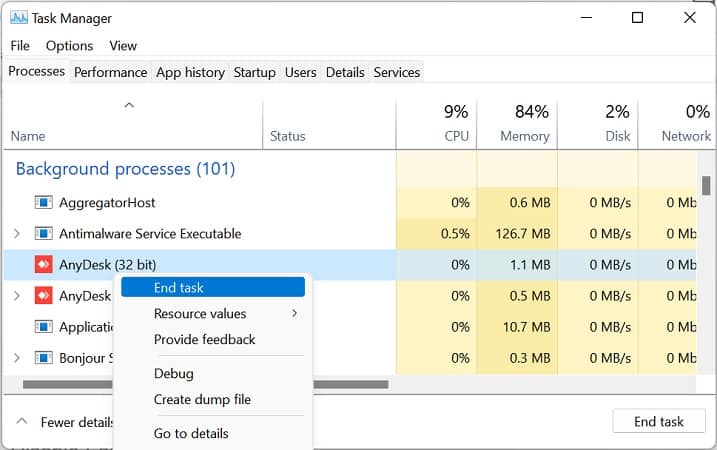
End Background Programs
If removing unwanted apps, scanning for viruses, and even limiting the browser tabs didn’t work, the lagging issue could be due to the programs running in the background.
Basically, these apps or processes continue to run even if you have closed them. Thus, they take up memory and might slow down your PC.
Below are the necessary steps you need to follow to end those background programs consuming excessive memory:
- Press Windows + X and choose Task Manager from the list.
- Next, in the Process tab, move to the Background Processes section.
- Right-click on those apps that are taking up significantly large CPU and memory usage and choose End task.

Disable Fast Startup Feature
Well, fast startup is a good feature if you want to boot Windows faster. While doing so, your PC hibernates instead of shutting down, and the next time you open your computer, you’ll be taken directly to the startup screen.
However, the Fast Startup isn’t always helpful. This is mainly because the PC settings aren’t updated and can potentially slow your PC. Although restarting your computer is an ideal option to get rid of such issue, it’s better if you disable the fast startup and ensure that your PC shuts down each time you press the power button:
- Use Windows + R and run the
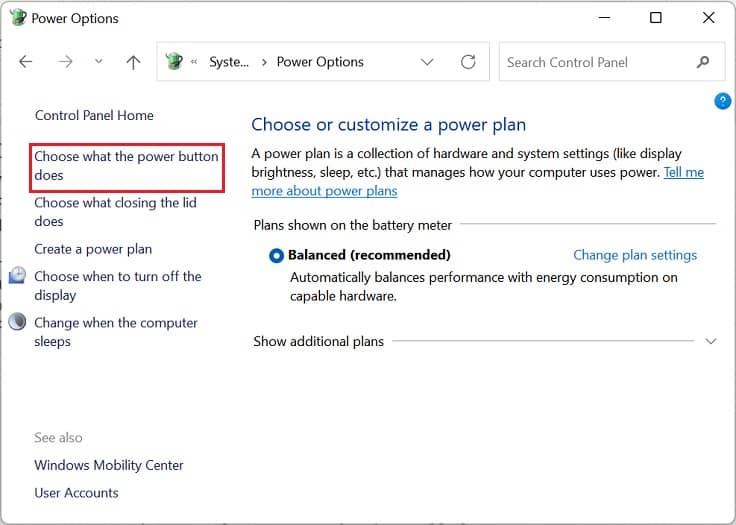
controlcommand to launch Control Panel. - Next, go to System and Security > Power Option.
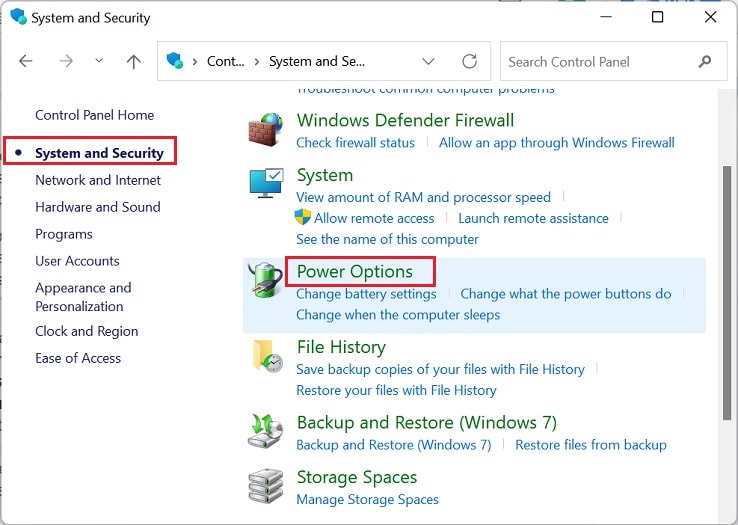
- Now, select Choose what the power button does from the left panel.
- Then, choose Change settings that are currently unavailable.
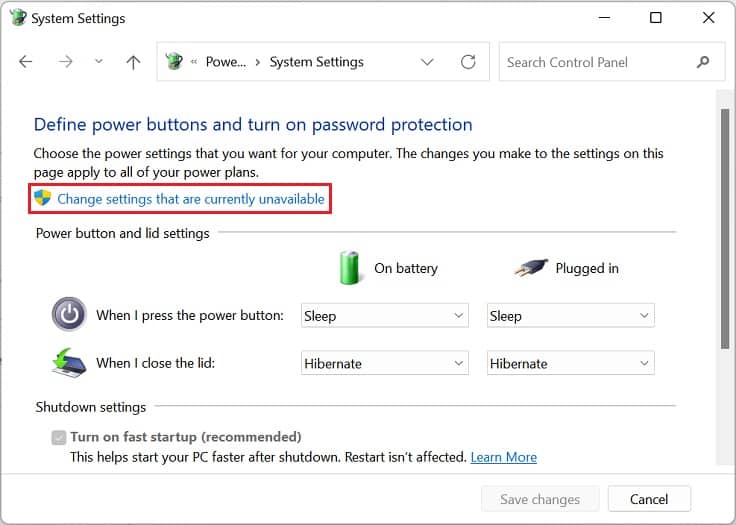
- Move to the Shutdown settings section and uncheck the Turn on fast startup (recommended) option.
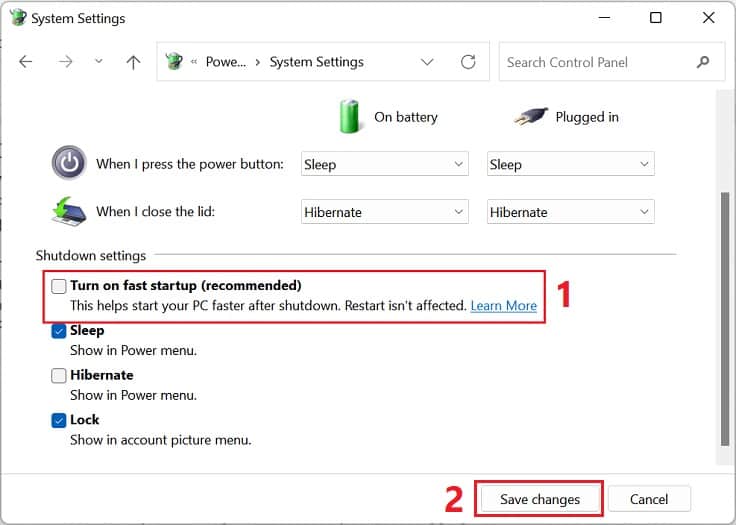
- Finally, click on the Save Changes button and restart your PC. This should update the necessary PC settings and eventually stop the lagging issue.


Disable Startup Apps
Like background apps and the fast startup feature, some startup programs can also cause input lags on your computer. This is mainly because when your PC tries to load several apps simultaneously, it takes up a lot of memory.
Hence, most users face slow Windows startup issues. To get rid of this, we recommend disabling startup programs and services:
- Press Windows + I keys to launch the Settings app on your computer directly.
- Then, navigate to Apps > Startup.
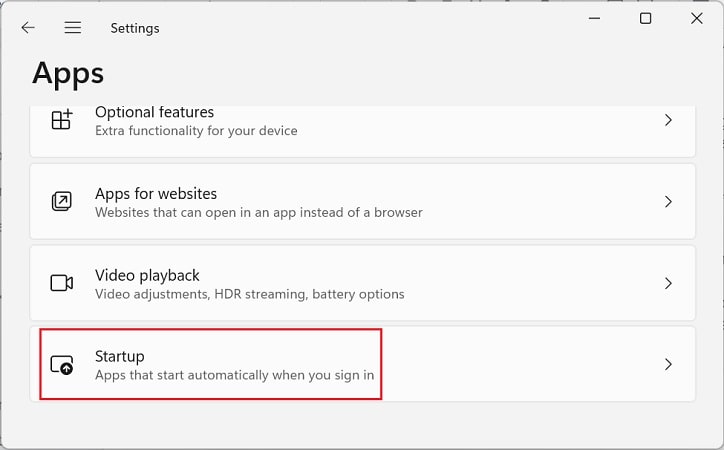
- Here, you’ll find all the apps that are started once the PC is powered. Interestingly, these are also classified with the impacts they cause to the system – No, Low, Medium, and High.
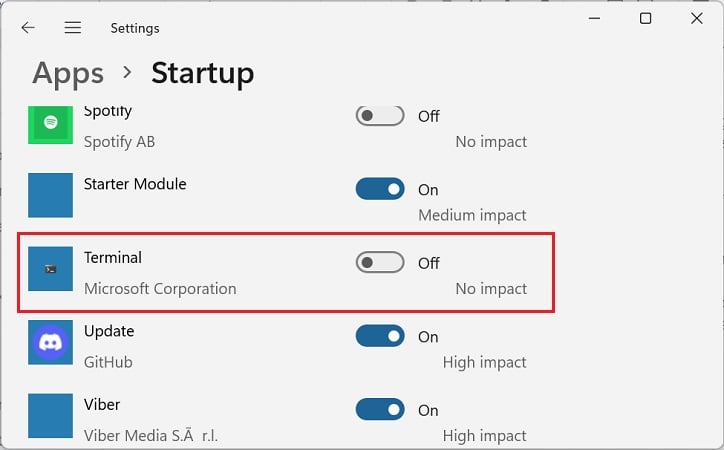
Well, you can either disable all of them or just those apps with high impact.

Run SFC, DISM, and CHKDSK Commands
Another reason for a slow and laggy computer is corrupted system files. Thus, to fix this issue, we highly recommend running the SFC command:
- Launch either Command Prompt or Windows Powershell with admin privilege.
- Here, run the below command:
sfc /scannow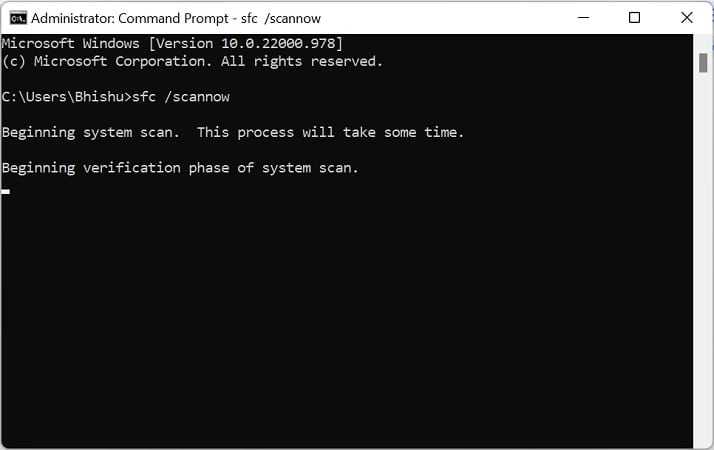
Basically, this will troubleshoot all your system files and fix any errors.

Similarly, if the disk image is damaged, this might create problems in your storage devices. So, here’s how you can restore or repair the Windows image:
- With the CMD or Powershell opened, copy and paste the below command:
DISM.exe /Online /Cleanup-Image /Restorehealth - Now, hit enter and wait until the restoration is completed.
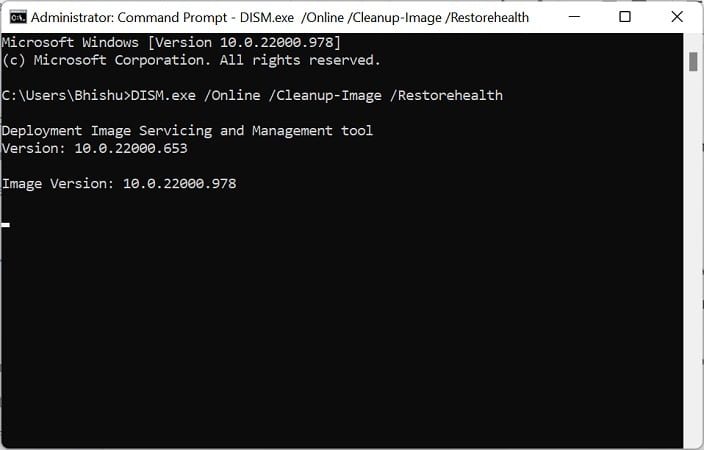
- Finally, you can even run the
chkdsk /f /r /xcommand to scan for any vital errors in your HDD or SDD.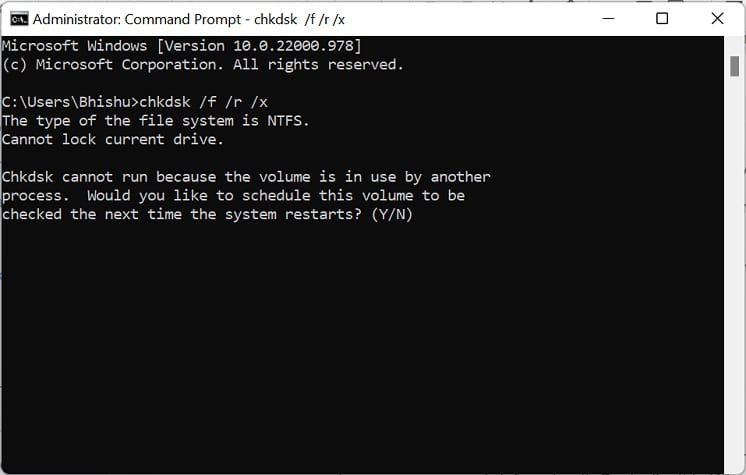

Defrag Your HDD
If you use a hard disk drive and the SFC, DISM, and CHKDSK commands don’t help speed up your computer, we recommend defragging it. Basically, this Windows feature allows the rearranging of disordered files on your HDD.
Go through the following guideline to learn how you can defrag in Windows 11:
- Press the Windows key and search for Defragment and Optimize Drives.
- Launch the utility and select your hard drive.
- Now, click the Optimize button and wait until the defragmentation is completed.
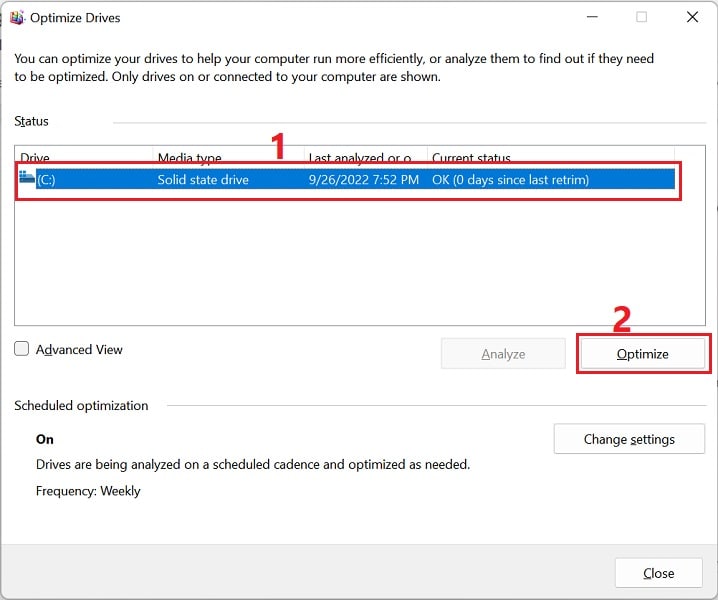
- Finally, choose Close and restart your computer. Now, your computer should speed up.

Perform Disk Cleanup
Another way to free up disk space is by performing disk cleanup. This will not just solve the lagging issue but also improve the overall computer performance:
- Search for Disk Cleanup utility from the Instant Search icon on the taskbar.
- Upon launching the tool, check all the file types you need to delete. The more files you choose, the more space you’ll save for yourself.
- Now, press the Ok button.
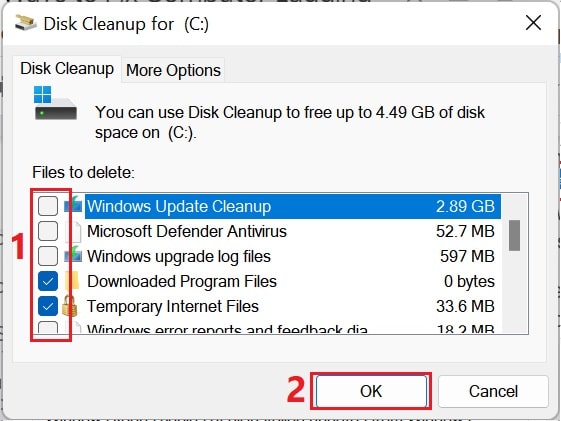
- Next, click the Delete files option and wait until these unwanted files are completely removed from your PC.
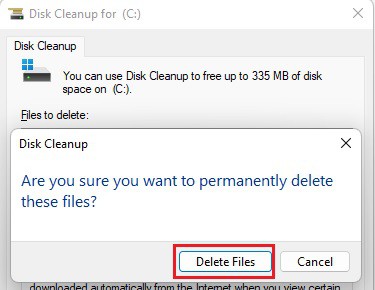
- If you’re still looking to save more space, choose the Clean up system files option under Description.


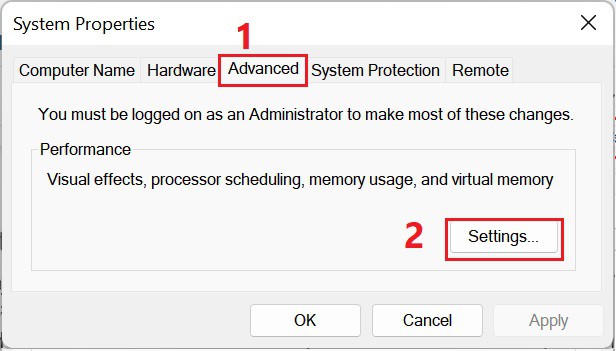
Adjust Visual Effects for Best Performance
Visual effects on your computer can take up unwanted memory and hardware resources, reducing performance. Thus, you can either customize or adjust these effects for the best performance. Follow the below procedure to learn how you can do so the right way:
- Firstly, show your desktop, and right-click on This PC to choose Properties.
- This will take you to the Settings window, where you can select Advanced system settings.
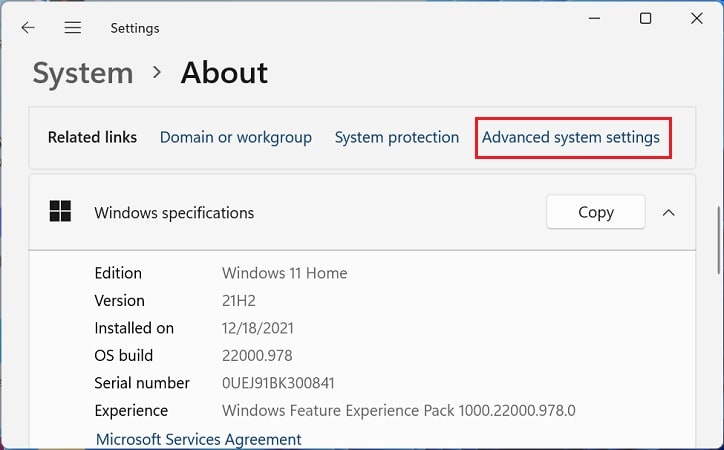
- Under the Performance section, click on the Settings button.
- Now, choose to Adjust for best performance in the Visual Effects tab. This will disable all the features so that your PC speeds up.
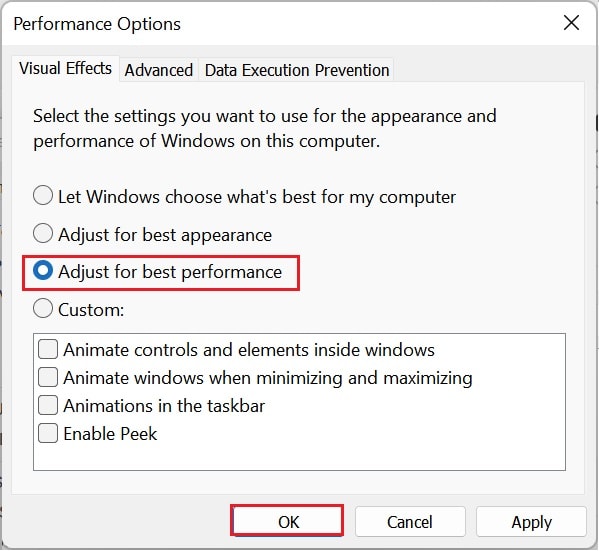
- Finally, press the Ok button to save changes.
- You can now restart your system, and your computer shouldn’t lag anymore.


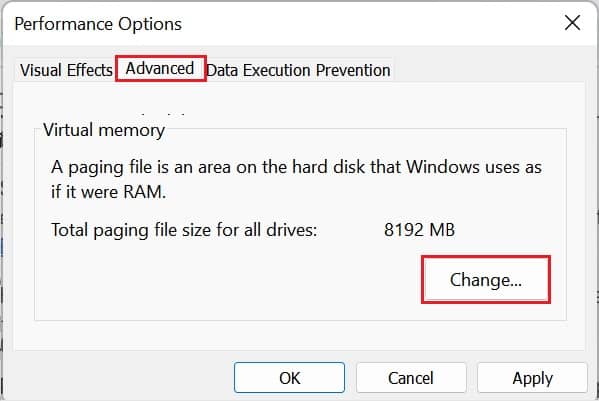
Configure Page File Settings
Page files are essential for the management of virtual memory on any computer. Basically, they hold all the temporary data in the hard disk and are used as an extension of RAM.
Since page files allow faster access to physical memory, using the correct settings is essential. Otherwise, you may face an incredibly lagging system, triggering the 0x00000050 BSOD error.
Below are the required instructions that will help you configure this setting depending on the storage device you’re using:
- Open Advanced System Settings, as mentioned earlier.
- Then, click on the Setting button under the Performance tab.
- This time, switch to the Advanced tab.
- Next, press the Change button under the Virtual memory block.
- Now, uncheck the Automatically manage paging file size for all drives option.
- Then, choose the System managed size if you’re an SSD user.
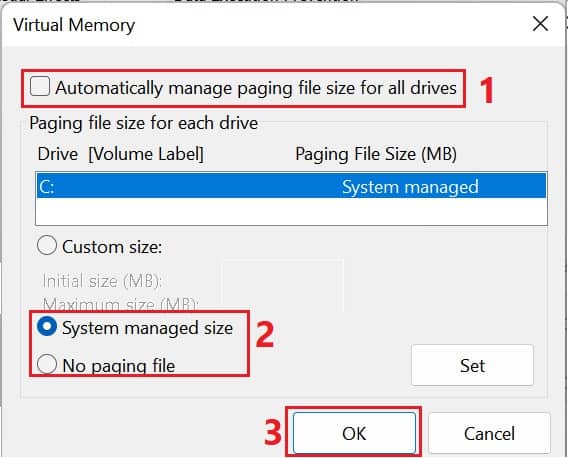
But if you’re using an HDD, we recommend setting the paging file for each drive to around twice the RAM size. - Hit the Ok button on all three dialogue boxes to make changes to the page file settings.
- Finally, reboot your system, and this should solve your problem.


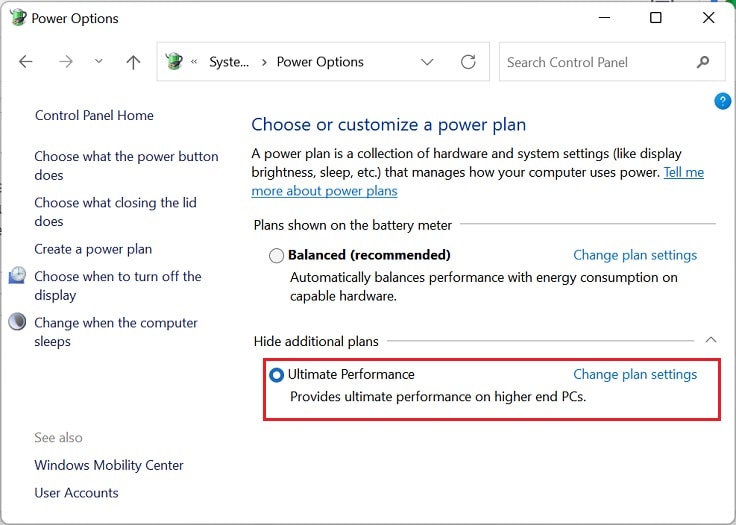
Customize Power Plan for High Performance
Power consumption is another factor that affects the computer’s speed. When your PC consumes more energy, it will likely perform better. So, you can use the unique Windows power feature that lets you increase your computer performance:
- Launch Control Panel and move to System and Security > Power Options.
- Now, expand the Show additionals plans drop-down.
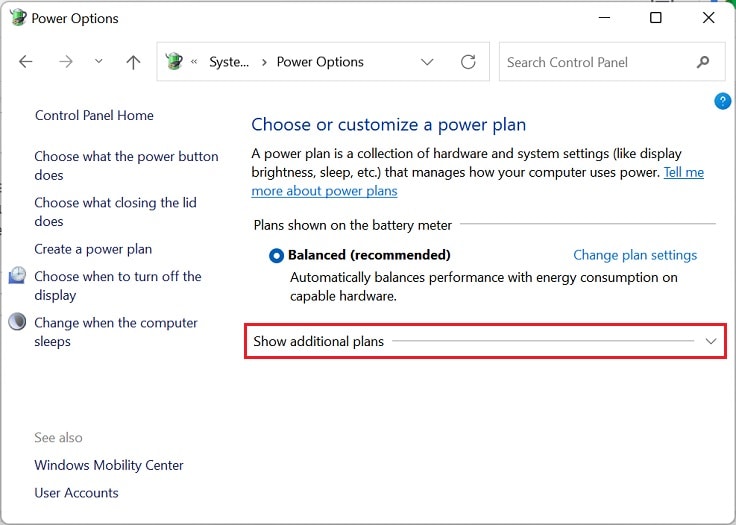
- Then, choose either Ultimate Performance or High performance, whichever is available, and restart your computer to see the positive changes in speed.
Update Windows & Drivers
If nothing above works for you, your computer is probably lagging due to corrupted drivers or the operating system itself. This mainly happens when you open your PC after a long time as the essential feature remains outdated.
In fact, you may witness a slow startup in this scenario, and the worst case is that your PC won’t even start. So, we highly recommend updating the system drivers and operating system to ensure that your system works smoothly:
- Press Windows + R and run
devmgmt.mscto launch the Device Manager tool.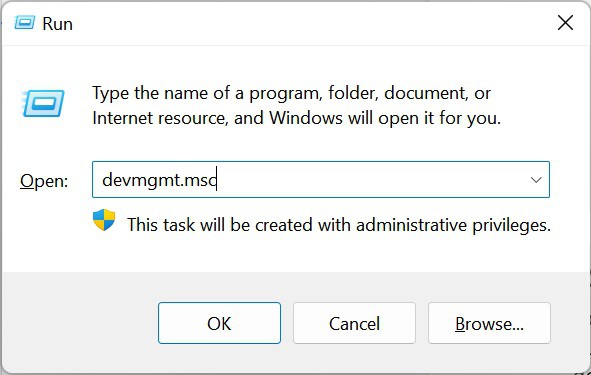
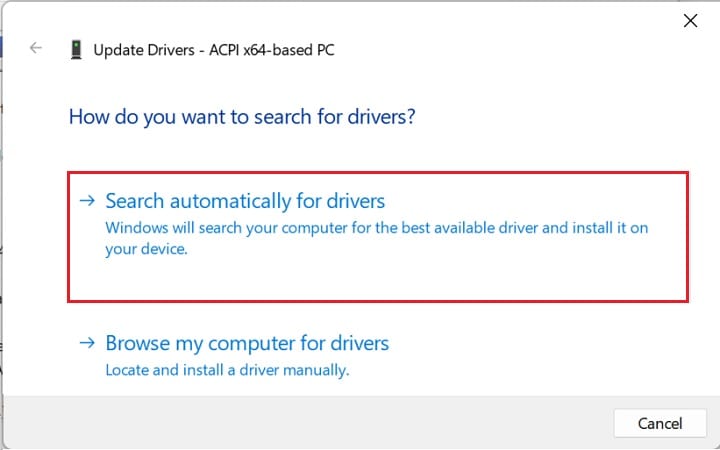
- Now, right-click on each device driver and select the Update driver option one by one.
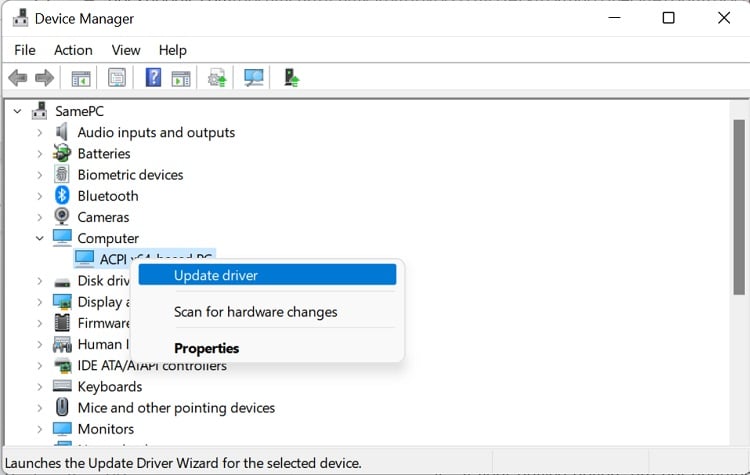
- Once the Update Drivers dialogue box opens up, click on Search automatically for drivers.
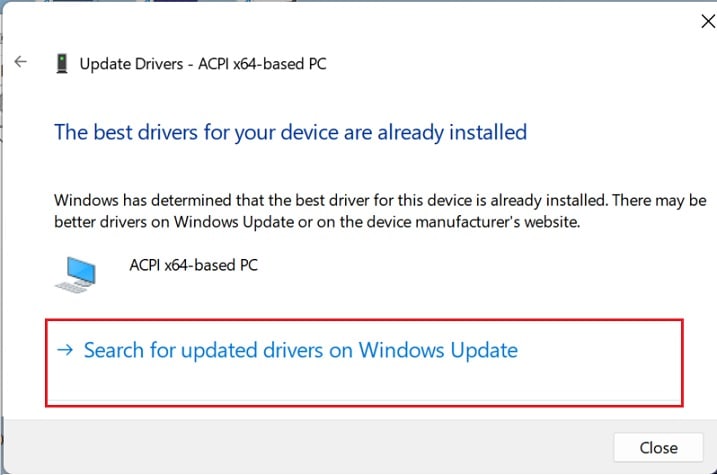
- If your device drivers are not updated, it’s time for you to update your OS. So, press the Search for updated drivers on the Windows Update option.
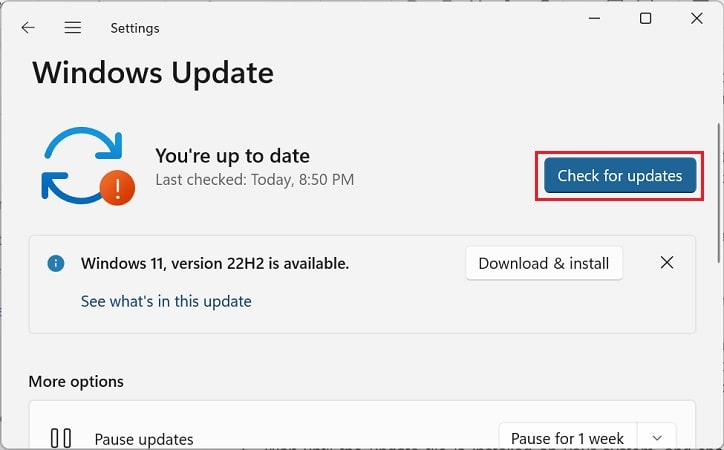
- Once you’re navigated to the Windows Update settings, click the Check for updates option if available.
- Then, press the Download & Install button.
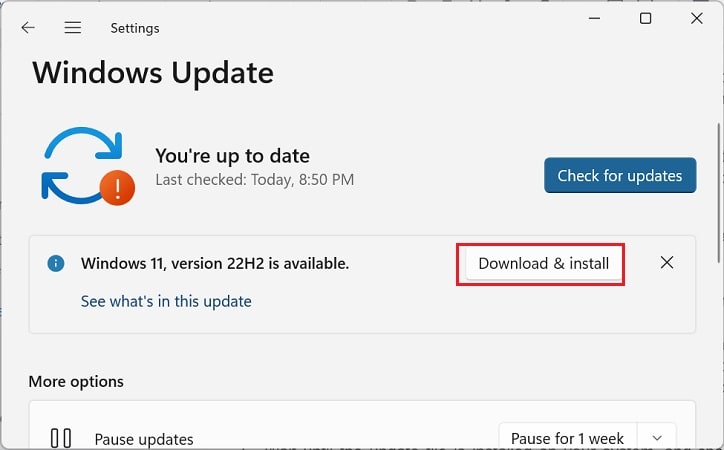
- Wait until the update file is installed on your system, and choose the Restart Now button. This should fix the lagging problem.


Restore Your PC
Sometimes, things can go the exact opposite. Generally, we update Windows to speed up our computers. However, there are times when some corrupted installation files will deteriorate your PC’s performance.
Indeed, the best option to resolve such an issue is to restore your computer to its previous state. And here’s the right way to do just that:
- Press the Windows key and search for Create a restore point. Choose it, and this will take you to the System Properties.
- Under the System Restore section, click on the System Restore button.
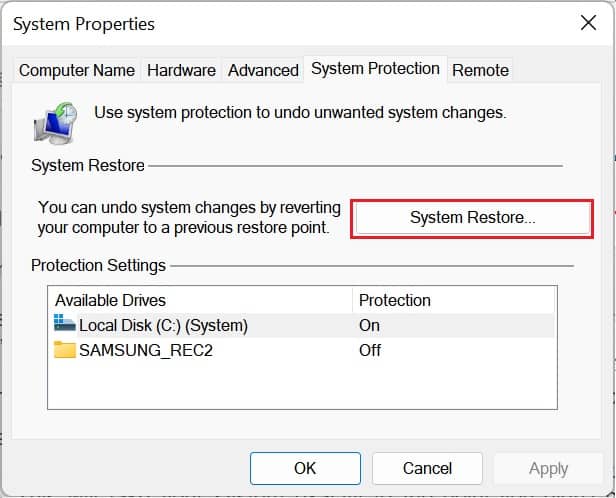
- Once a new dialogue box launches, you can choose either Recommended restore or Choose a different restore point.
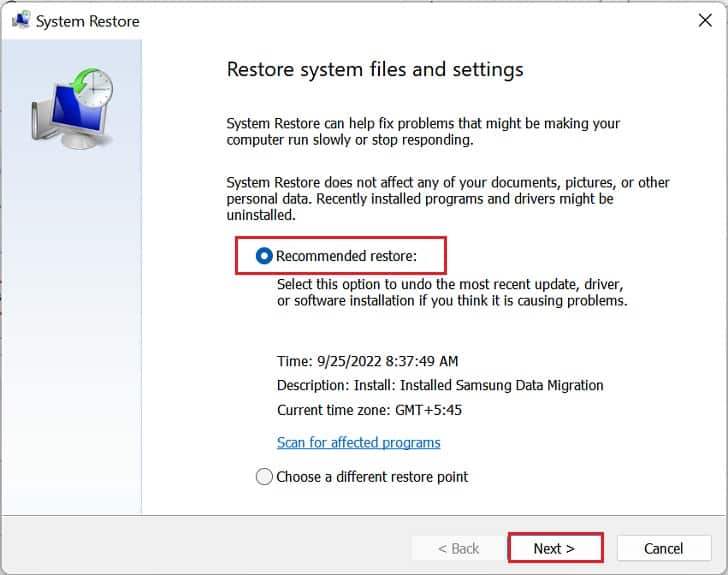
- Hit Next and move to the next window. Now, press the Finish button and wait for your computer to restart.
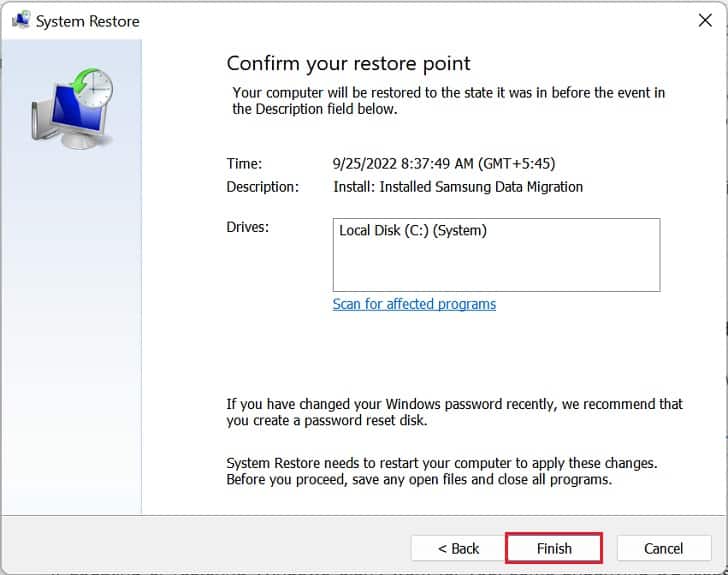
- Finally, follow the on-screen instructions and complete the system restoration process. This will take your system exactly to the point you didn’t experience lag issues.


Perform Factory Reset
If updating or restoring Windows didn’t work for you, some underlying OS issues might be slowing down or causing lagging problems on your computer. So, you can perform a factory reset to remove everything and start using the PC from scratch.
While performing a factory reset, you also get an option to keep some essential files. Nonetheless, we recommend backing them up on USB devices or online storage systems and deleting everything so that your PC doesn’t start lagging again:
- Open Settings on your PC and go to System > Recovery.
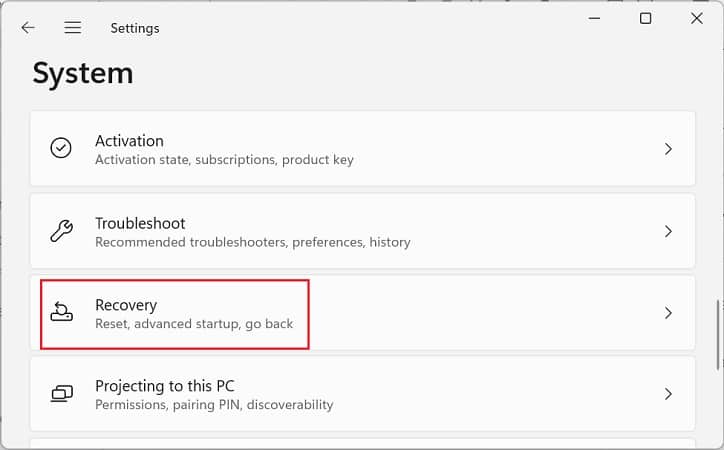
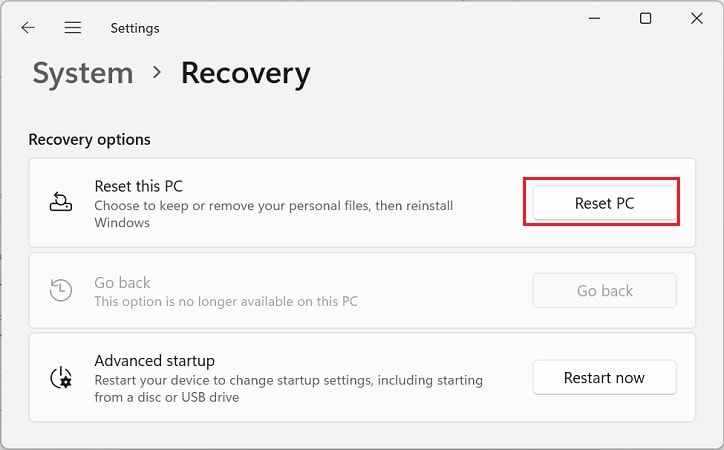
- Under Recovery options, you’ll find the Reset this PC option. Simply click on the Reset PC button.
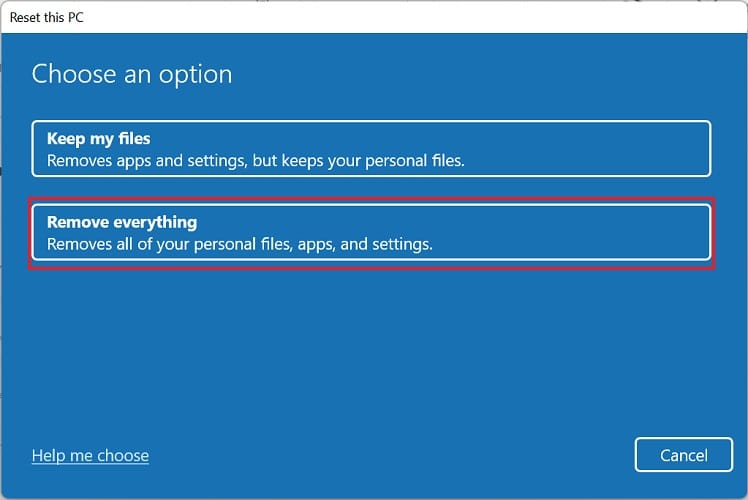
- Now, you’ll be directed to a new window. Here, select the second option – Remove everything.
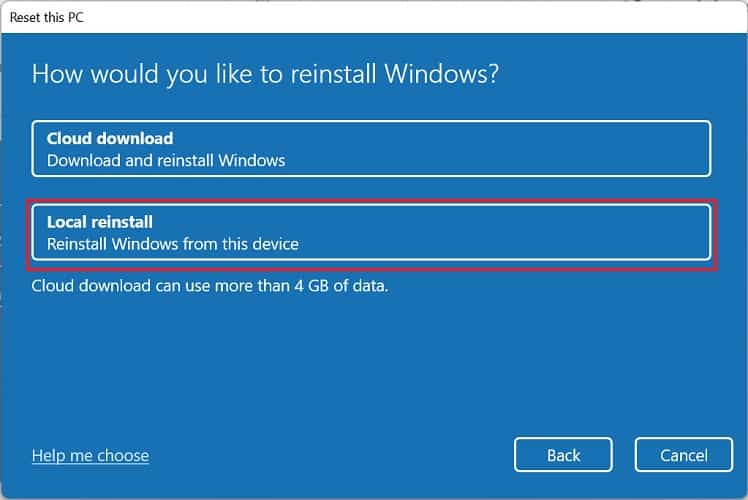
- Wait until the reset process starts; this time, tap on Local reinstall.
- Next, your computer restarts, and all you have to do is follow the on-screen instructions to complete the factory resetting process.
- Finally, install Windows again and start using a lag-free computer.

If you’re a laptop user and still experiencing lag issues, you can try the Google Chrome OS Flex, which is free and easy to install. In fact, here’s a complete guide on how to turn your laptop into a Chromebook.
Replace or Upgrade Hardware Components
If none of the aforementioned fixes solve your lagging issues, there are serious issues within your hardware components. Precisely speaking, your HDD or SDD is not healthy, or your graphics card, RAM, or even CPU needs an upgrade.
Firstly, we highly recommend switching to SSD if you still use an HDD. This provides you with a faster data transfer rate with increased bandwidth. Indeed, this will ensure that your computers run smoothly without any lags.
Although replacing these hardware components is relatively easy, there are still many things to be considered.
Well, you can go through our following guides to learn how to upgrade each component properly:
- Upgrade laptop’s storage
- Upgrade your RAM
- Upgrade graphics card the right way
- Upgrade CPU on laptop