


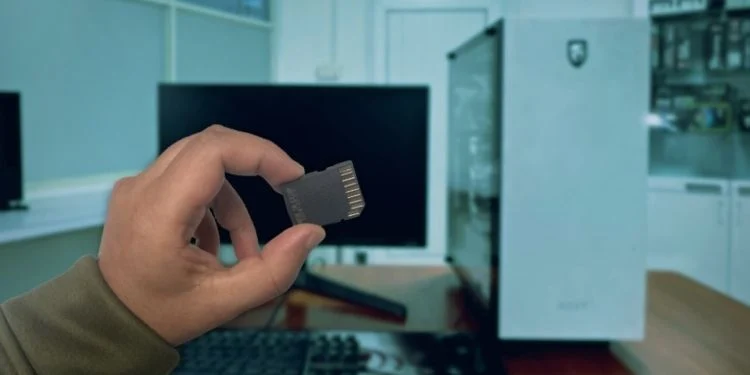
SD cards, also known as memory cards are primarily used in smartphones, cameras, and other electronic equipment to store blocks of data in NAND flash.
Like any other storage device, they can run out of space after extensive use. Once that happens, you’ll either need to delete some files or back them up on your PC. But before doing anything else, it’s essential to properly insert the SD card into your device.
Unlike most laptops where dedicated SD, miniSD, or microSD slots are available, only a handful of PC cases provide such. If yours doesn’t have one, you’ll require additional gadgets, like USB Card Reader or USB Hub. To learn more, kindly go through the step-by-step guide below.
Step 1: Know Your SD Card
Firstly, you need to identify the SD card family you’re using — standard, mini, or micro. Each of them differs in terms of size and is categorized into four types based on memory capacity — SDSC, SDHC, SDXC, and SDUC.
As per the comparison chart above, the standard SD cards have 32 × 24 × 2.1 mm dimensions, while that of Mini and Micro are 20 × 21.5 × 1.4 mm and 15 × 11 × 1 mm respectively. Clearly, each card requires a dedicated slot and won’t fit inside the other ones, unless you use an adapter jacket.
If you’re new to SD cards and are unsure about which one you’re using, directly check its label. Every memory chip does have clear indications on one of the sides.
Step 2: Check for SD Card Slot on Your PC
As mentioned earlier, memory card slots on desktop computers are quite rare. If your PC case has one, you’ll likely find it on the front panel USB, along with the other ports.
After identifying the SD card type, kindly check for the dedicated slot on your PC. For example, if you have a micoSD card, look for a smaller port of 15 × 11 × 1 mm dimension with the label ‘microSD’.
If you find one, you may directly proceed to the fourth step. Otherwise, you require an additional tool, which we are going to discuss next.
Step 3: Get a Preferable Gadget
You can find plenty of useful gadgets online that allow you to access data from the SD card. They are cost-effective and portable. All you have to do is insert the memory chip into the device and then connect it to the computer.
SD Card Reader
SD Card reader or often called a memory card reader is an input device that allows direct connection to the USB ports on your PC. Their working is identical to USB flash drives; the only difference is that you need to first insert an SD Card into its dedicated slot.
Well, there are different types of card readers available in the market today. You can find USB Type-A, Type-C, or even OTG. Most of these tools have multiple memory card slots, such that you can use a single connector for all your SD, microSD, and miniSD.
SD Card Adapter Jacket
If the PC already has a memory card slot but yours is a miniSD or microSD chip, you should rather opt for an SD card adapter jacket. Also, it is much cheaper than a card reader.
In order to make use of this tool, first insert the microSD or miniSD card inside the jacket. Now, utilize the available SD slot on your PC to fit the adapter jacket.
USB Hub or All-In-One Card Readers
Besides adding USB ports to your PC, some high-end Hubs also offer microSD and SD card slots. You need to first insert a memory chip here and then connect the device to your PC using its USB Type-A or Type-C cable.
In self-powered USB Hubs, ensure to attach the dedicated AC adapter to the power port. But if the device is bus-powered, connecting it to the computer is enough for providing the required voltage and current to run it.
You may even opt for an All-In-One Card Reader which looks identical to a USB Hub. Along with the similar working, it’s much more cost-effective.
Media Dashboard
If you want to permanently add an SD slot to your PC, we advise getting a Media Dashboard. These are also called front panel card readers and can be installed in the drive bay.
However, not all Media Dashboards are going to fit into the casing due to the mismatched form factor. So, kindly purchase the one that perfectly sits on the front panel. You can simply look for the dimension in the product’s specification.
Below is a quick guide that should help you install a Media Dashboard to the front panel of your PC casing:
- Firstly, shut down your PC and unplug all the power connections.
- Next, unscrew all the screws from the left and right sections to open the PC case.
- Also, remove the drive bay’s plastic cover where you’re going to attach the Media Dashboard.
- Now, insert all the cables through the hole and fit the dashboard in place. You may use cable ties so that the inside of the case doesn’t look messy.
- Then, tighten the screws such that the drive bay holds the Media Dashboard in place. Some models also come with lock adapters, as shown below.
- Get to the motherboard and connect all the cables. These include a USB header, USB 3.0 cable, an Audio header, and two SATA cables.
- Also, connect the Media Dashboard’s power cable to the PSU’s female connector.
- Once everything is done, close the PC chassis and tighten the screws.
Additional Tip:
You can view or transfer photos and videos on the SD card directly from your smartphone without the need for any gadgets mentioned above. All you have to do is insert the memory card on any Android device, and connect it to the PC using a USB to USB-C data cable.
Step 4: SD Card Insertion
Once you’ve purchased a recommended gadget, the next step is to attach your SD card. However, if your PC already has a prebuilt slot, you may directly insert the memory chip there. Kindly go through any of the below methods, whichever seems applicable to you.
Caution: Forcefully inserting the memory chip into its slot may damage the contact pins or even break the card. Ensure the pin alignment is done properly before pushing it all the way in.
Insert SD Card Directly to the Slot
Whether your PC casing has pre-built SD card slots or you installed a Media Dashboard, you can now directly insert the memory chip. Here’s the correct way to do just that:
- Take the SD, microSD, or miniSD card and ensure the label faces up and the contact pins are down.
- Now, insert the chip into the PC’s dedicated memory slot. While you’re at it, make sure it fits perfectly in.
- You’re just not done yet. To properly establish the connection, you’ll need to push the card further. If it’s a microSD, you should even hear a click sound.
Insert SD Card into a Desired Device
Whether you’re using a USB SD Card Reader, Adapter Jacket, USB Hub, or an All-In-One Card Reader, you need to first attach your memory chip to these gadgets. Once that’s done, you can insert or plug in the device to the applicable PC port. Note that these tools can also come in handy in laptops having no SD slots.
- First, make the SD, microSD, or miniSD label face upwards and the contact pins down.
- Carefully insert the chip into the gadget’s dedicated slot. For demonstration, we’ve pushed a microSD to the adapter jacket first.
- Then, we plug the adapter into a USB-C card reader.
You may even join it to a USB Hub or All-In-One Card reader as demonstrated below. - Now, insert the device into the appropriate port. For example, the USB-C SD Card Reader can be plugged into any available USB-C port on the PC.
Similarly, you can insert the All-In-One Card Reader into the USB-A port.
Step 5: Test Your SD Card
After successfully inserting a memory card into your PC, the final step is to determine whether your PC is detecting it. To do so, simply check the This PC directory:
- Press Windows + E hotkey to open Windows Explorer.
- From the left pane, select This PC.
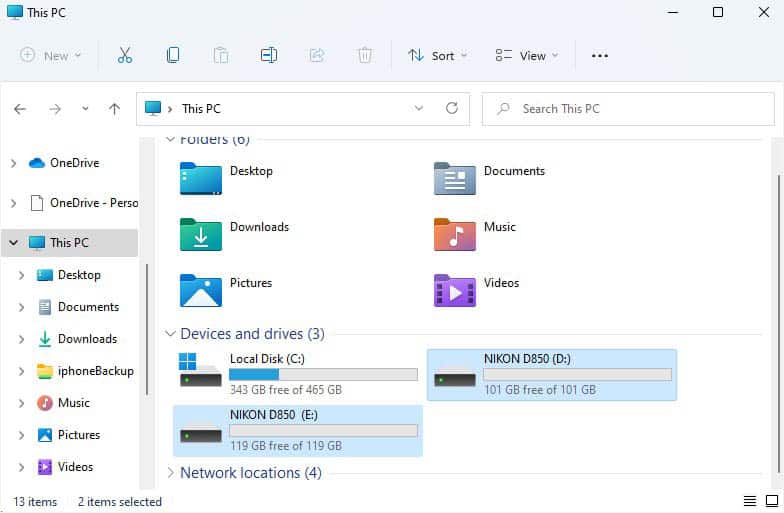
- Move to the right section and expand the Devices and Drives section, if required.
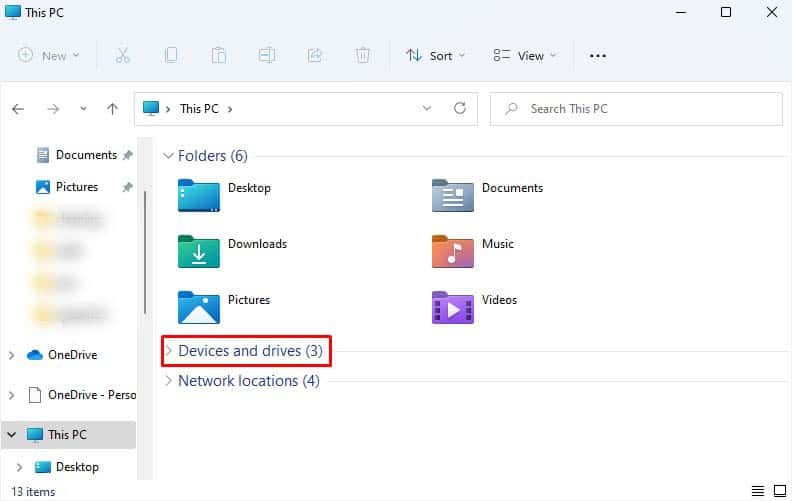
- Finally, check for a removable disk drive to confirm that your SD card is detected. It could be named D, E, F, or any other letter depending on the number of storage devices you have connected to your PC.


![Huawei Modem Unlocker V5.7.7 Free Download Mediafire [TOP]](https://die4tech.com/wp-content/uploads/2022/06/download-3-3.jpg)